Some mentions to BIPES project!
https://www.hackster.io/magicbit0/bipes-with-magicbit-block-based-integrated-platform-a3dbaa
https://www.youtube.com/watch?v=5Tu4BAkZTjE
Mobile Robot programmed using BIPES / Blocks.
Parts: 2 servos for movement; 1 servo for sensor positioning; 1 HCSR04 ultrasonic sensor; ESP8266 module.
To access the program, just use the link:
http://bipes.net.br/beta2/ui/#iz4268
EasybotDS kit used:
We have just migrated the old repository:
https://github.com/rafaelaroca/bipes_ui_testing
With all BIPES sources to this new shining repo:
https://github.com/BIPES/BIPES
And took the opportunity to add a discussion forum based on github discussions!
Damien George, MicroPython creator explains at 1228 seconds of the video :
It is now possible to use BIPES with Arduino UNO, MEGA, NANO and Pro thanks to https://sneklang.org/. Thank you Keith for the great work on Snek.
If you want to try, just open the browser, go to:
https://bipes.net.br/snek-web-uploader/
Flash snek on your Arduino and use BIPES to program your Arduino using Snek blocks from BIPES.
Program ESP32 using Bluetooth and BIPES / Web Bluetooth REPL
Install the required libraries (ESP32 must be connected to the Internet):
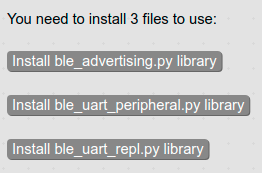
You can install by connecting to the board using BIPES console tab, and clicking on each of the buttons above, which are available on the toolbox (Select ESP32 board on the top right, then go to Network -> Web Bluetooth REPL).
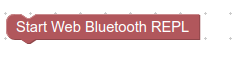
Then you need a single block:
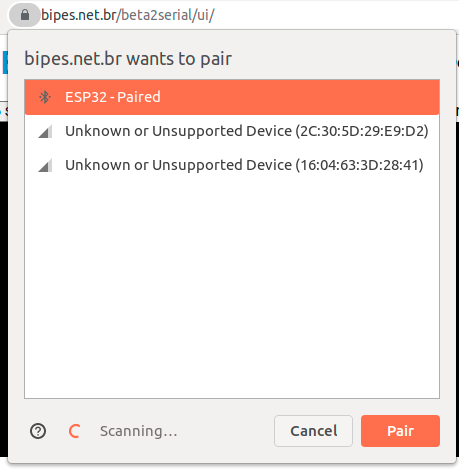
Pair the device mpy-repl / ESP32:

Go to BIPES Serial:
https://bipes.net.br/beta2serial/ui/
On the Console, click on connect (Web Bluetooth):
And the REPL is available using Bluetooth:
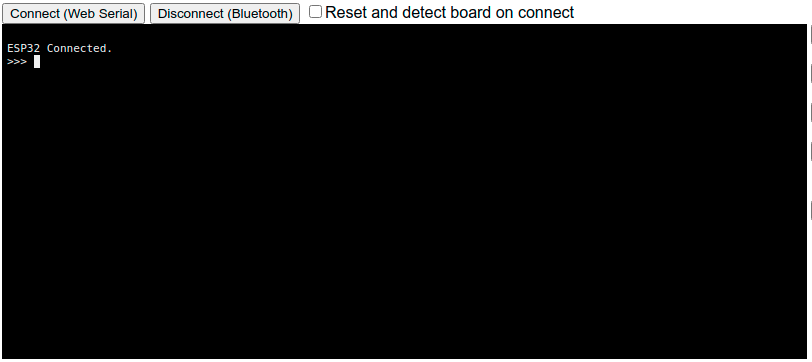
Now you can interact with the board using Bluetooth, send block-based programs, manage files, etc.
Here is one example that reads the ADC of the ESP32. Using BIPES-DATA block, you can view the data on the dashboard!

Console:
IOT tab:
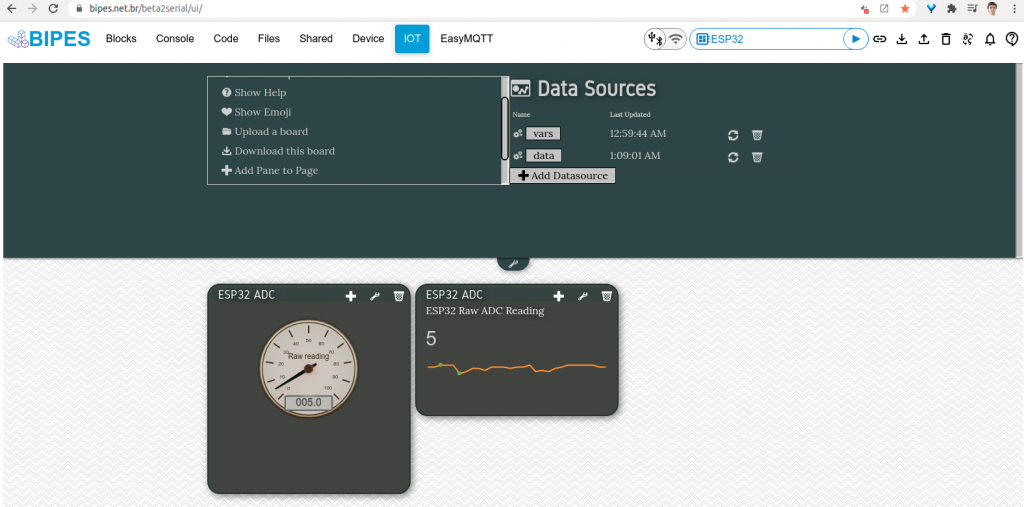
Program sent to the board using Bluetooth, REPL access and dashboard data view from Bluetooth data!
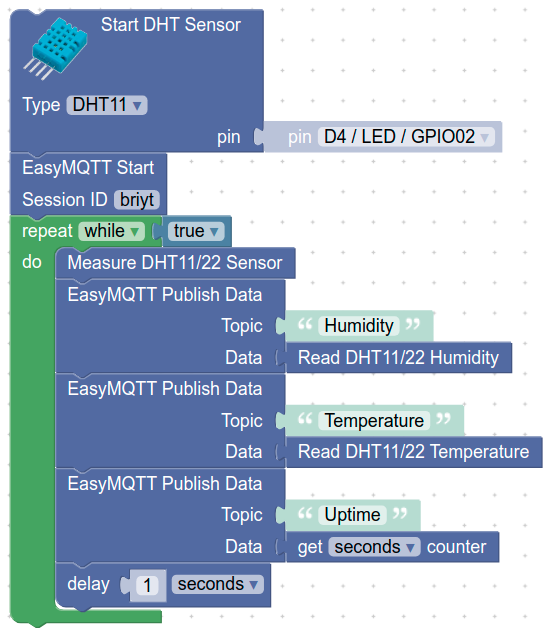
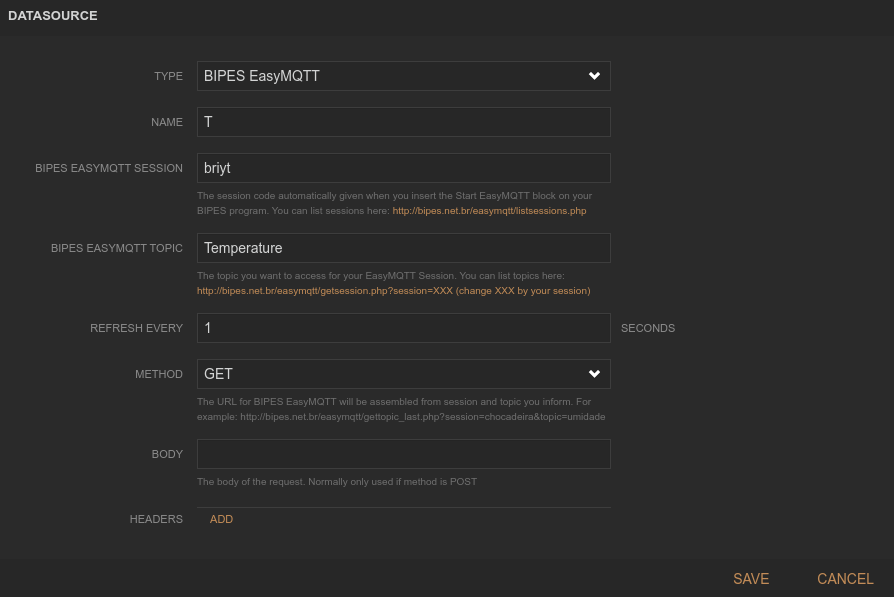
BIPES offers an EasyMQTT data source for freeboard dashboards. Moreover we embedded freeboard on the BIPES IoT tab. Programs can send data to the EasyMQTT server, which is stored and can be seen on the dashboard.
Here is an example program:
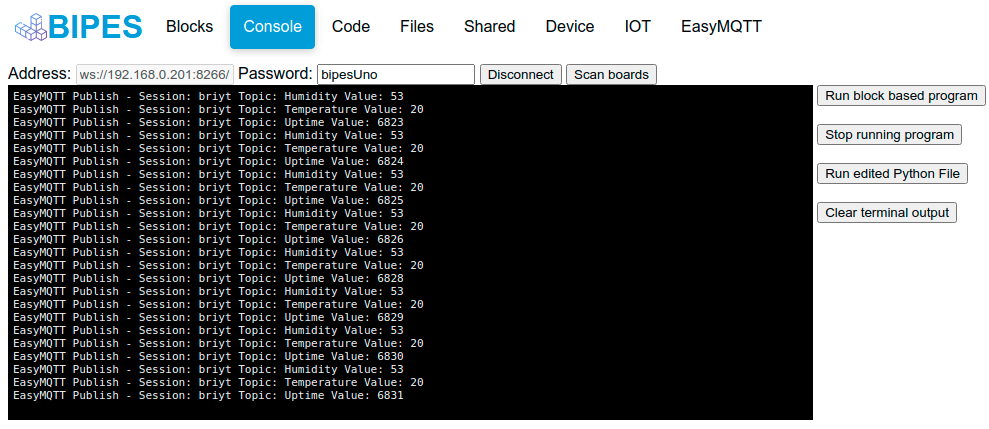
When the program starts, the console tab show its operation:
Next, by clicking on EasyMQTT tab, it is possible to see how data are changing:
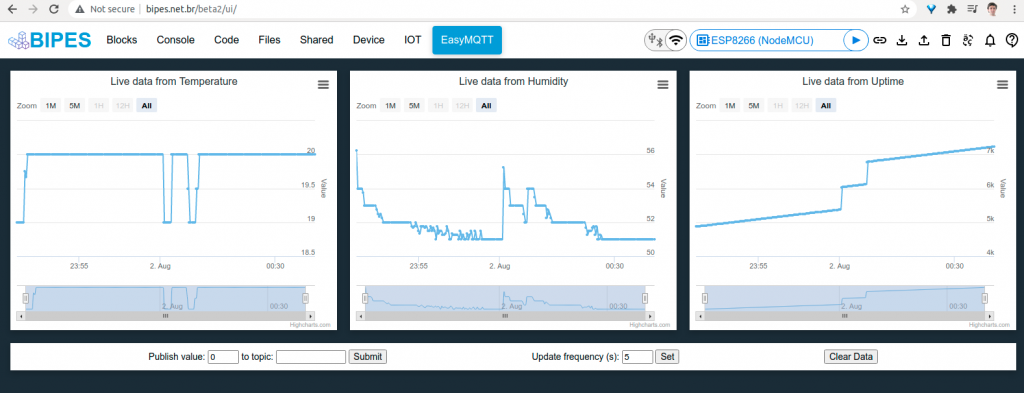
Now, we can go to the IoT tab and one data source for each EasyMQTT topic for this session:
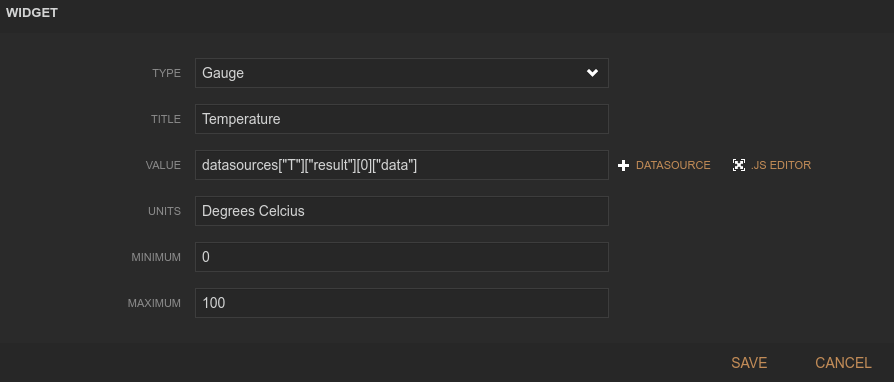
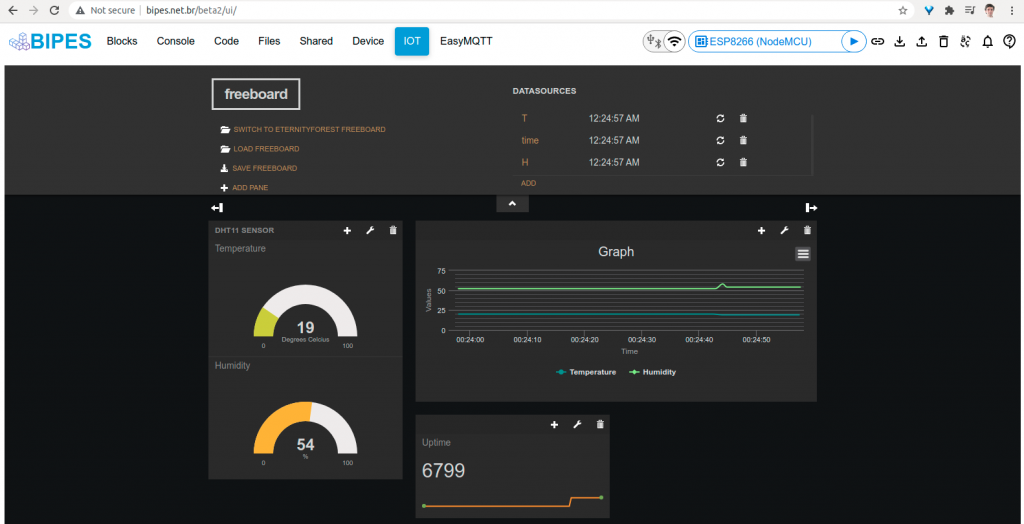
Next, add panes and widgets to panes, as this example:
Here is one possible setup:
This is a quick demo of Block-Based Integrated Platform for Embedded Systems (BIPES) and an ESP32 board running MicroPython to play RTTTL songs!
You can use it at:
https://bipes.net.br/beta2serial/ui/
The circuit is quite simple: a generic ESP32 board and a buzzer connected to GND and pin D23. No software installation required.
Just get a board, load MicroPython once and use BIPES to program and interact with the board using a web browser.
Thanks @PicoKit for the feature suggestion:
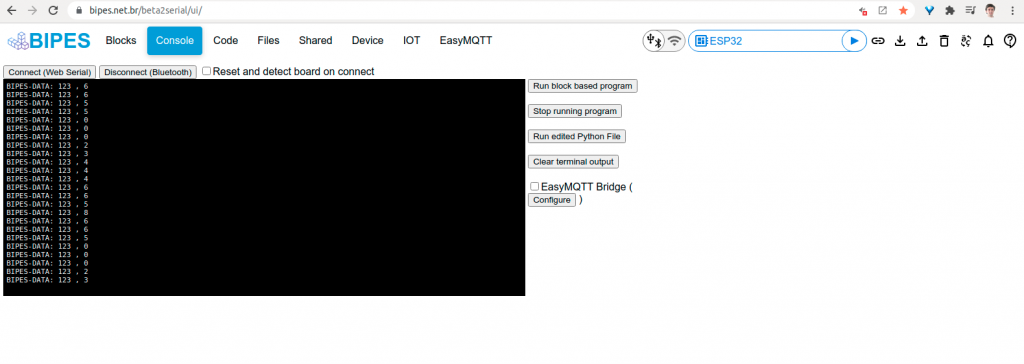
BIPES allows you to create powerful dashboards based on freeboard. There are several possible data sources for the dashboard, but one interesting BIPES feature is to update the dashboard locally, with data from USB, Serial, or Bluetooth, without any network connection!
This works with any board that has a USB – Serial port, such as Raspberry Pi Pico, ESP32, ESP8266, STM32, and even Arduino. Yes! You can use BIPES to create a complete dashboard for Arduinos without connecting to a network, and no software installation is required. The Arduino does not need any additional shields or connections. Just plug the USB cable, receive data on the BIPES terminal and update the dashboard.
Here is a quick example:
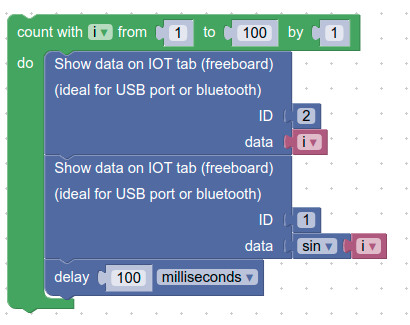
First, create a program that sends that to the dashboard. For example:
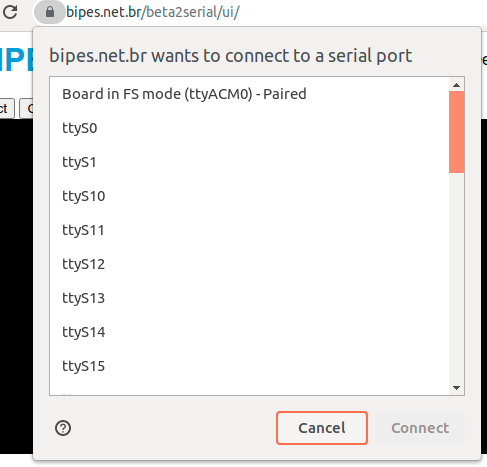
Then, connect to the board, using Console tab. You can make a Serial/USB or Bluetooth connection:
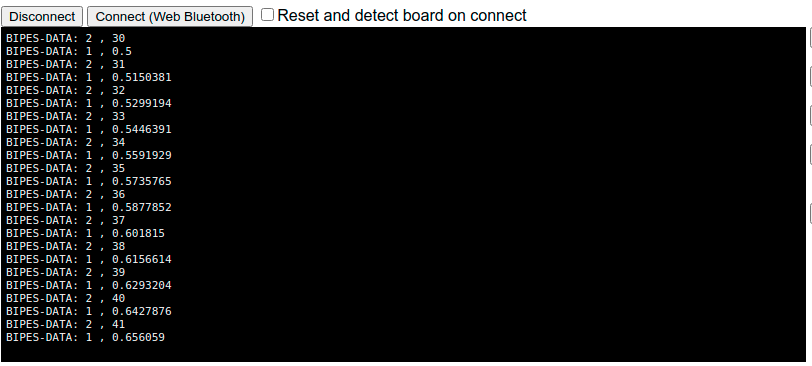
Note that we used ID 1 and ID 2.
If your microcontroller is not programmed by BIPES, no problem! Just print BIPES-DATA on the serial port. On Arduino, for example, you can use the code:
void setup() {
  Serial.begin(115200); //BIPES Console is an online terminal @115200bps
}

void loop() {
  int i = 1;

  while (i <= 100) {
    Serial.print("BIPES-DATA:1,");
    Serial.println(i);

    Serial.print("BIPES-DATA:2,");
    Serial.println(i*2);

    i = i + 1;
  }
}
Now, let’s add widgets to the freeboard dashboard. Go to the IoT tab. Select if you want Forest or classic freeboard using the option “Switch to Classic Freeboard” or “Switch the EternityForest Freeboard”.
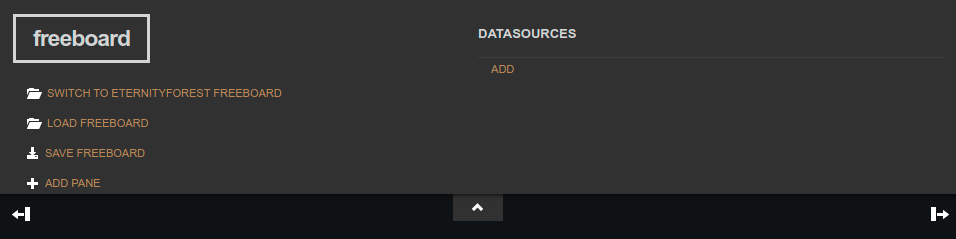
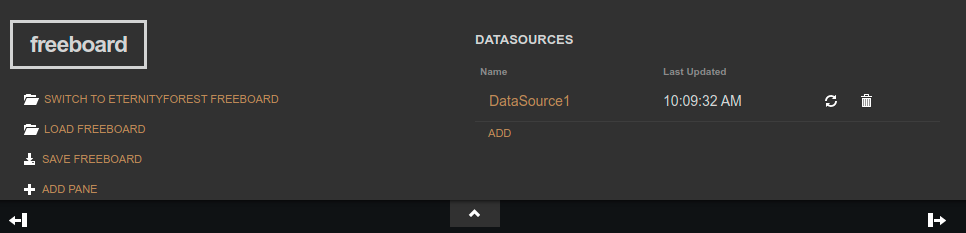
On the DATASOURCES area, click ADD and select BIPES Serial, USB or Bluetooth:
Give a name to the data source (you will use the name on the widget)
Select a message ID used on the blocks or Arduino code (1 or 2, on this example).
Define a refresh rate. It can be less than 1 second, such as 0.1
Save!
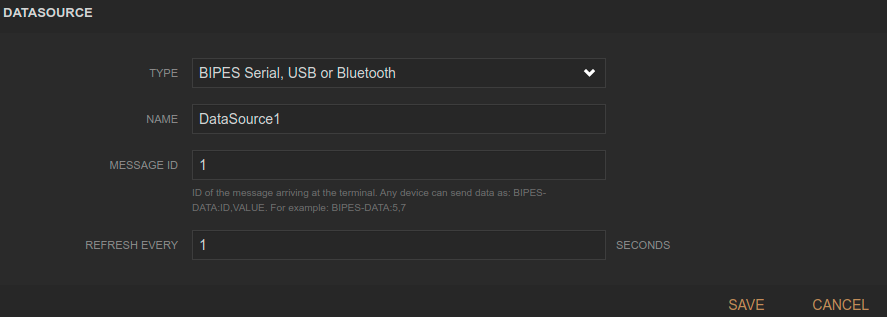
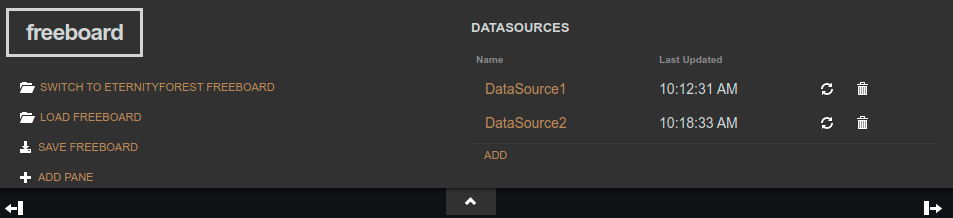
I also added a DataSource2 with ID 2, using the ADD button again.
Now you can run your program and see the results using the console tab. Start your program.
Last updated will show “never” if data for that ID never arrived and will show the update time when data arrives and is updated.
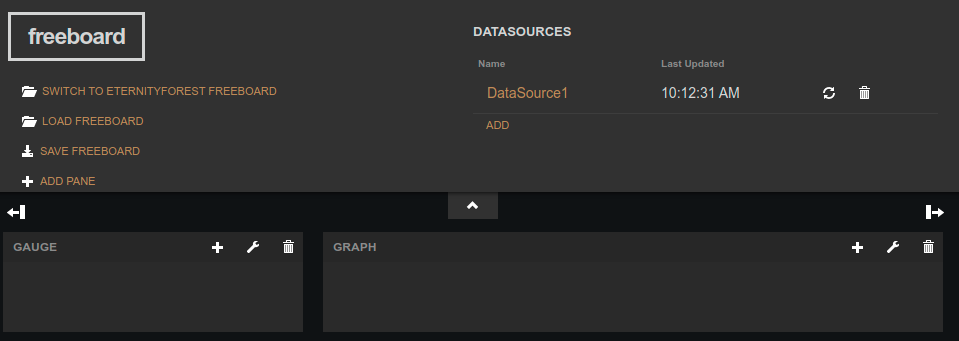
Now, let’s add some widgets:
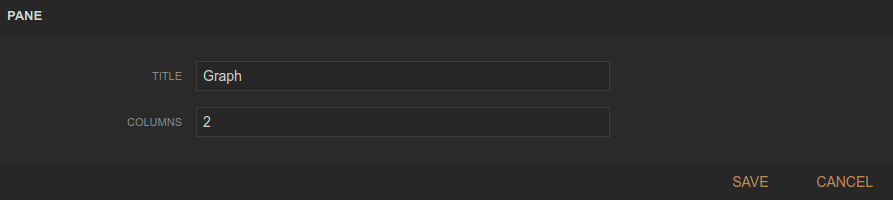
Click on ADD PANE. You can add several panes, drag and drop them, and click on the wrench to configure their titles and sizes.
The options are:
Then, you can add widgets to the panes, by clicking on the plus button on each pane:
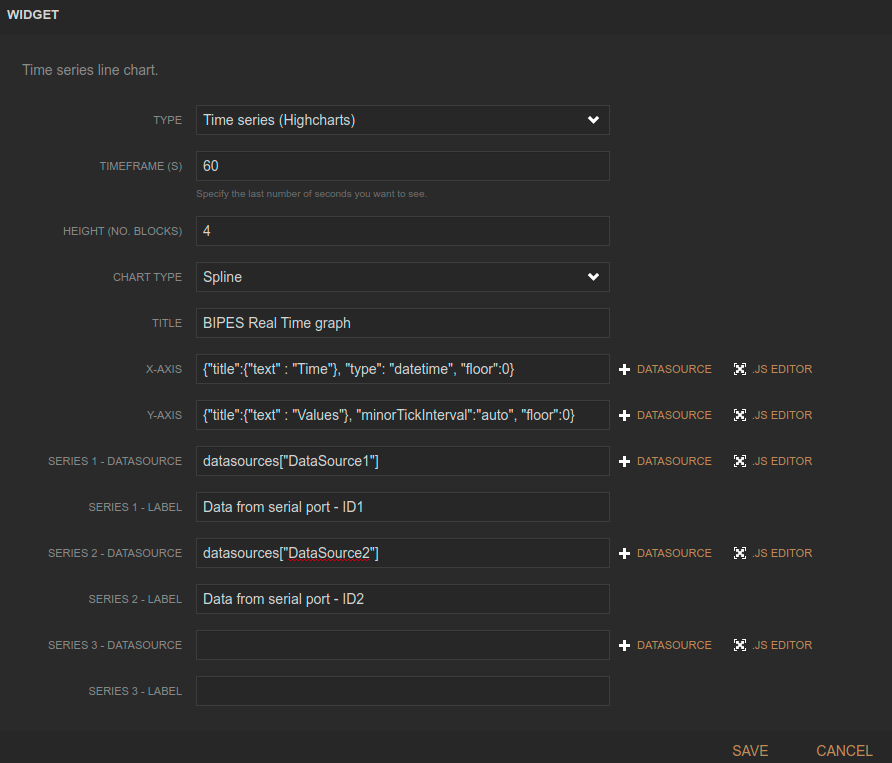
A chart:
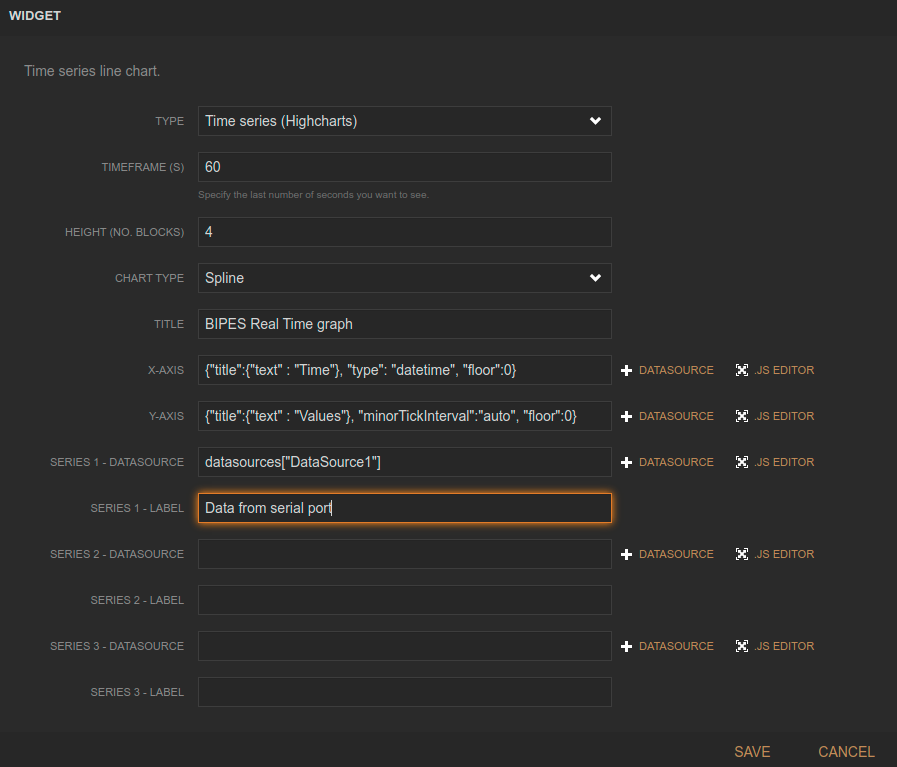
You can also have other lines on the graph:
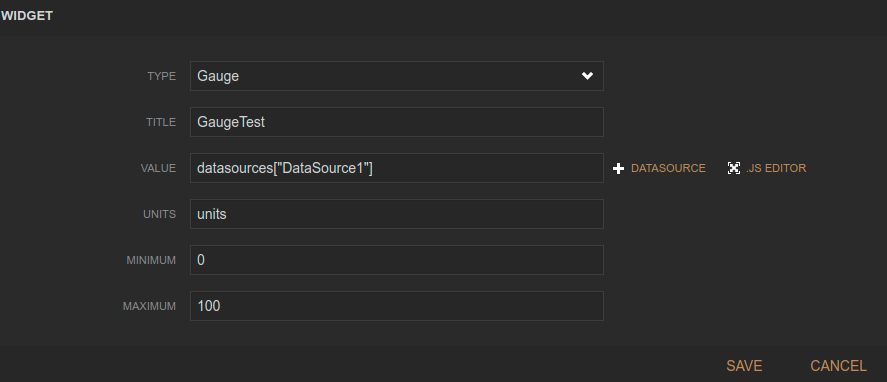
Now let’s add a gauge:
And finally a text:
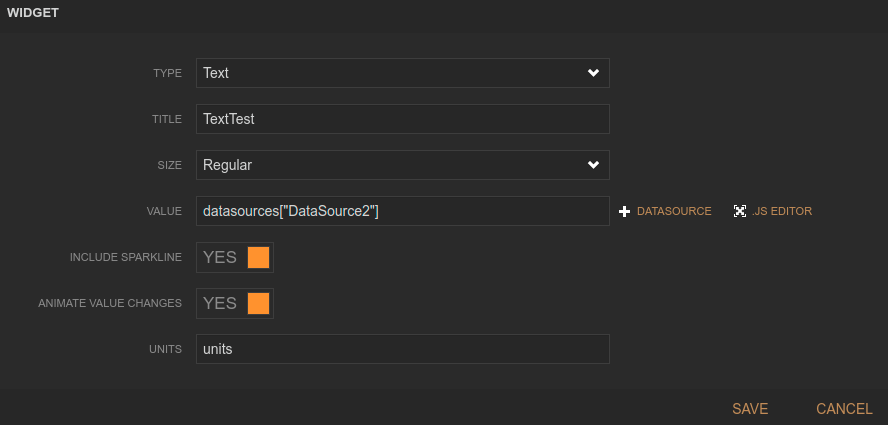
Here is the final result:
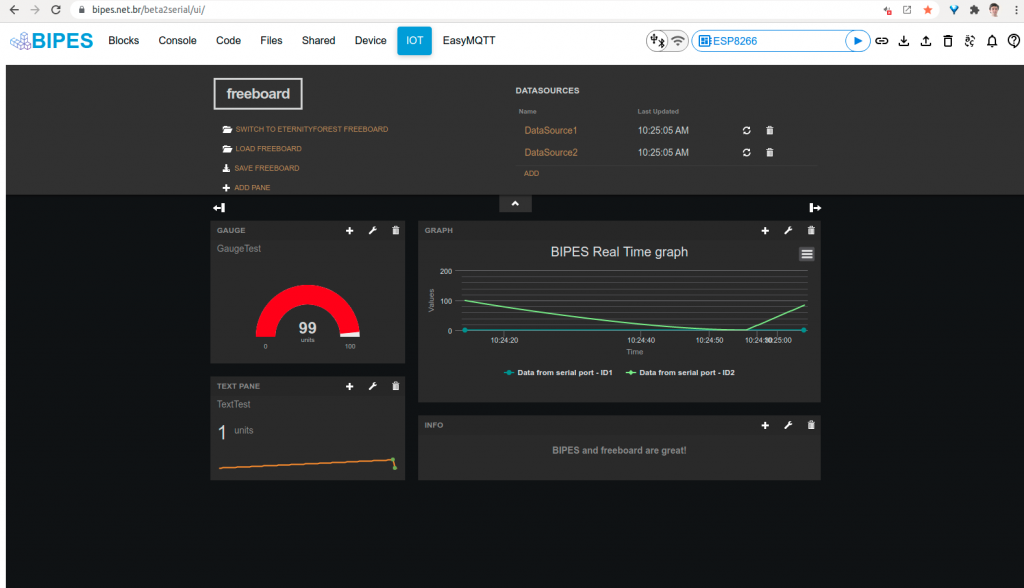
Start the program and see the results on the dashboard!
Another nice feature: even using USB or Bluetooth, you can you BIPES Bridge to send to received data on the dashboard to the BIPES EasyMQTT server, and share the results using the Internet with anyone.
Board -> USB or Bluetooth -> BIPES Console -> EasyMQTT server -> EasyMQTT view from anywhere!
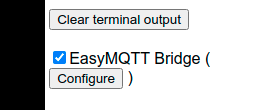
To use this feature, just enable the BIPES Bridge on the Console, by clicking on the checkbox:
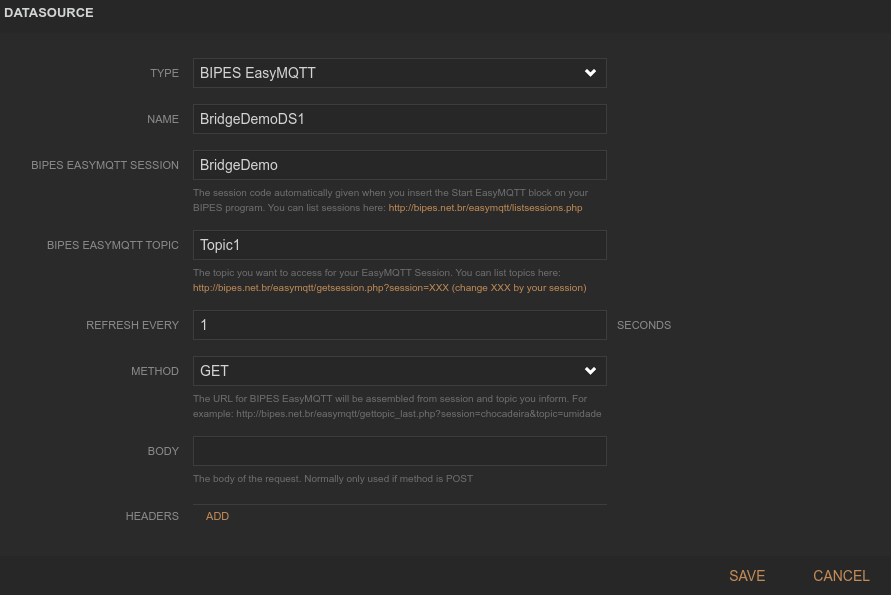
You can configure the EasyMQTT Session name using the configure button:
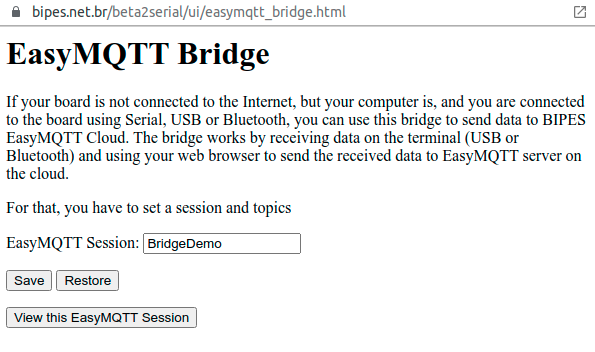
Finally, access the EasyMQTT page:
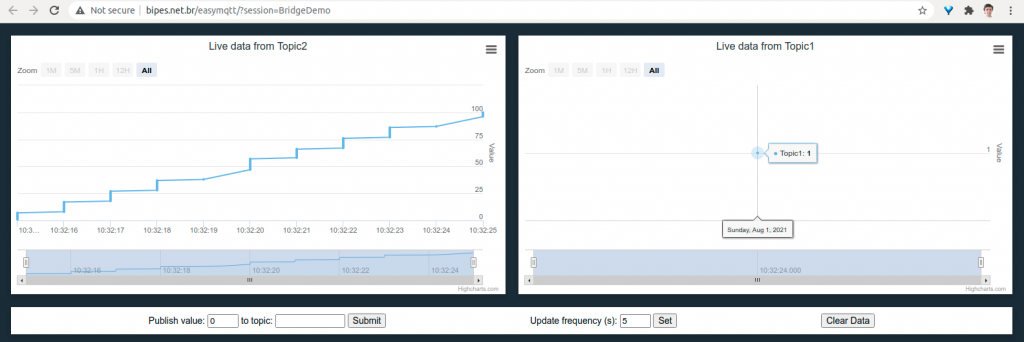
http://bipes.net.br/easymqtt/?session=BridgeDemo
You can share the link with anyone, anywhere!

Start the program, and the graph will be updated:
Finally, you can also create use the EasyMQTT datasource on freeboard, which can be used to share EasyMQTT to freeboard over Internet:
Freeboard source code with BIPES datasource sources: