August has been an important month for BIPES and has brought many improvements to the platform.
New features
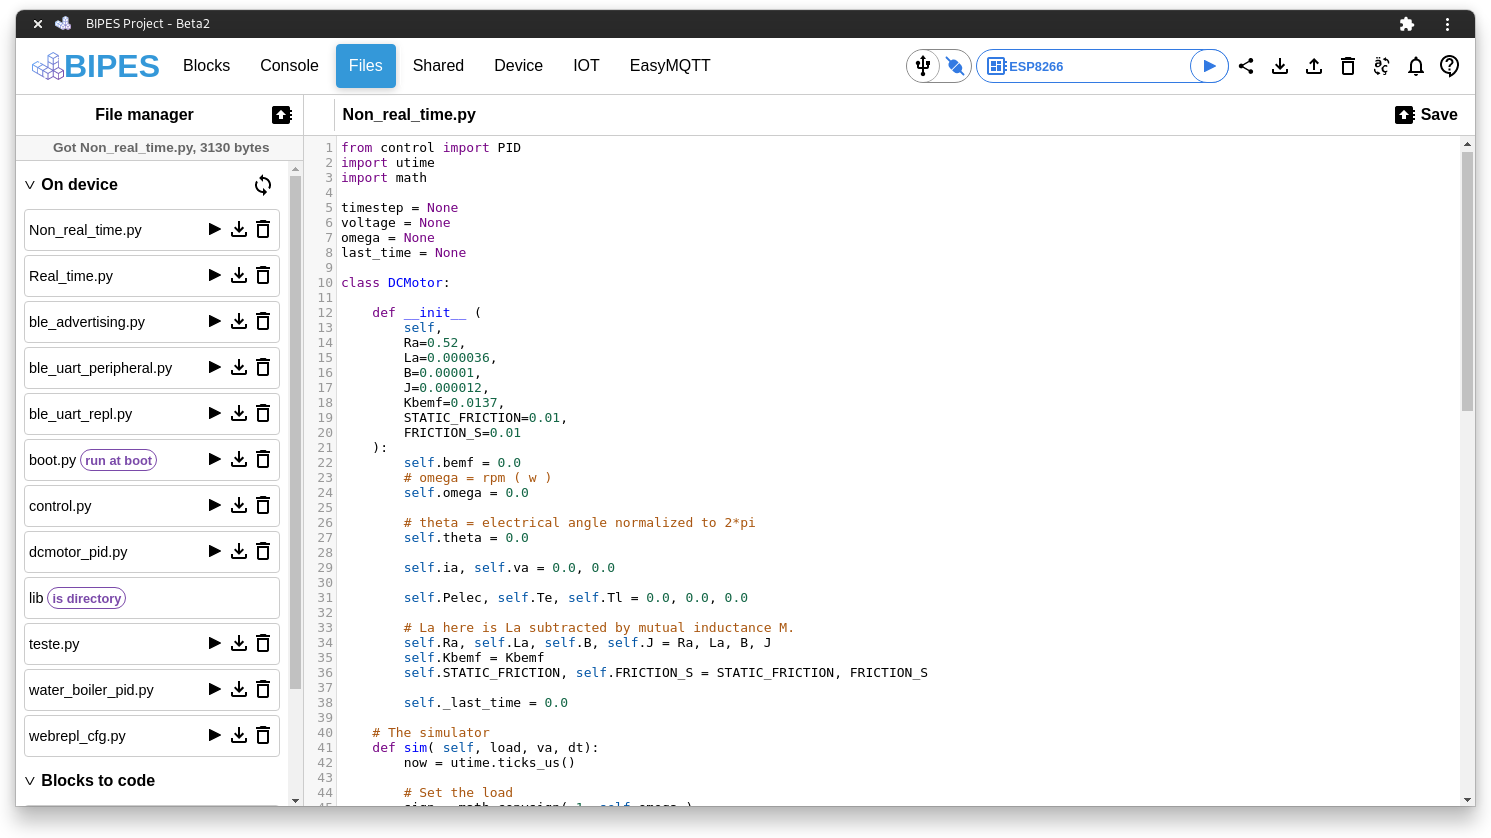
Files gets a makeover
We completely changed how the Files tab looks and works, now it’s easier and more reliable to work with your device internal files and uploading through serial is incredibly fast1. We also merged the Code with the Files tab, so the workflow is more concise.
The BIPES XML file can now be edited and pushed directly, so you can see, test and hack how the platform loads the blocks and workspace info. We are planning to include more relevant data in the XML soon, like the freeboard JSON.
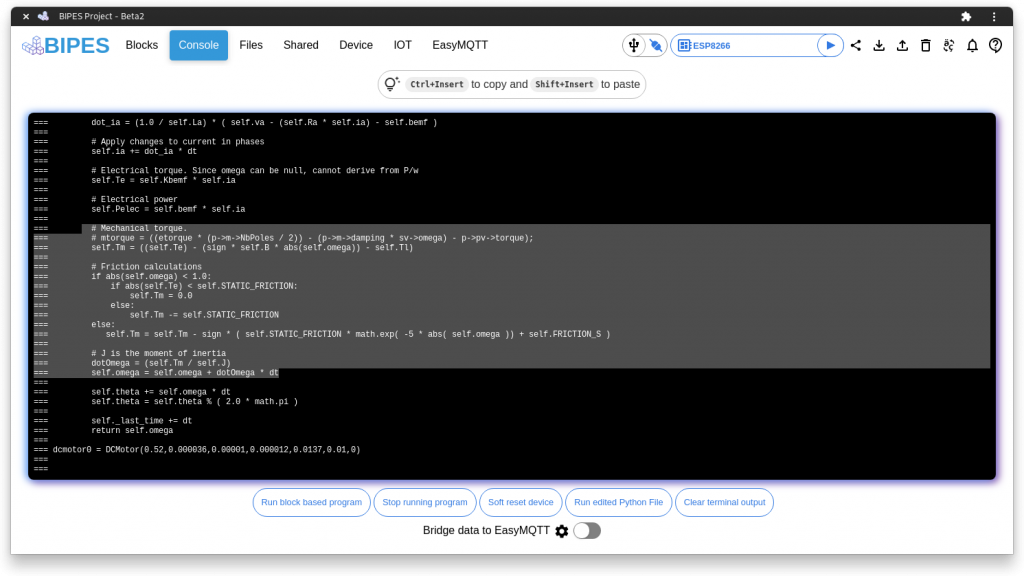
Console boosted by xterm.js
We upgraded the terminal library to xterm.js, the most common solution for webapps, used in many projects like CodeReady Workspaces, Katacoda and that code editor from that glassware company(humor).
It works well on phones and tablets and you can now copy and paste full chunks of data into the terminal with Ctrl+Insert and Shift+Insert.
Do more with the IOT tab
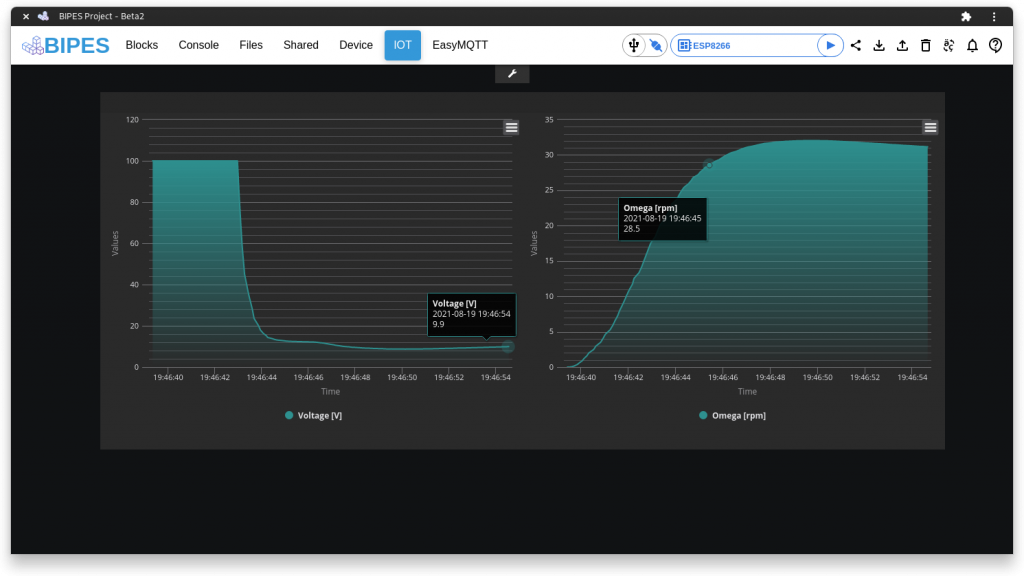
Create graphs with your IoT data directly into BIPES with the freeboard dashboard. Both MQTT and Serial (with BIPES Plot block) are supported data sources. You can also redirect your serial data to MQTT with the EasyMQTT Bridge feature, so you won’t loose it if closing the browser.2
Underlying changes
Unified repository
First of all, we combined all version (Serial, Bluetooth and TCP/IP) in one single code base, available now on our new repository at github.com/BIPES/BIPES.
This move will improve code quality, allow easier documentation and contributions by and for the community.
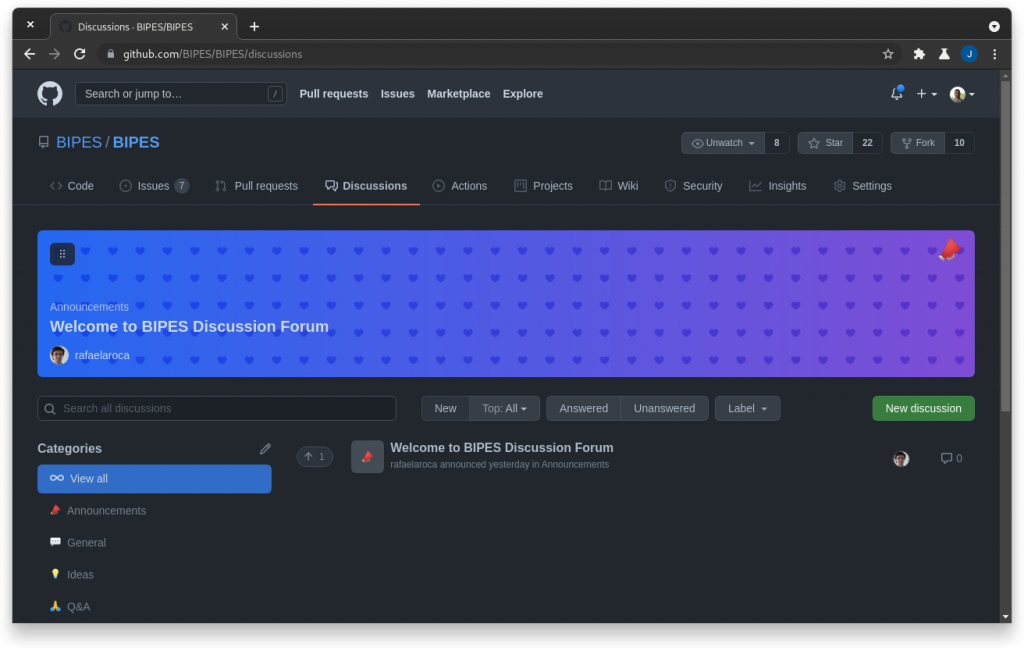
Also, we decided to use GitHub new Discussions feature as our forum, since the last self hosted one ended up with tons of spam (and we just won’t bother raging a war against the machines(humor)).
Continuous Blockly code generation
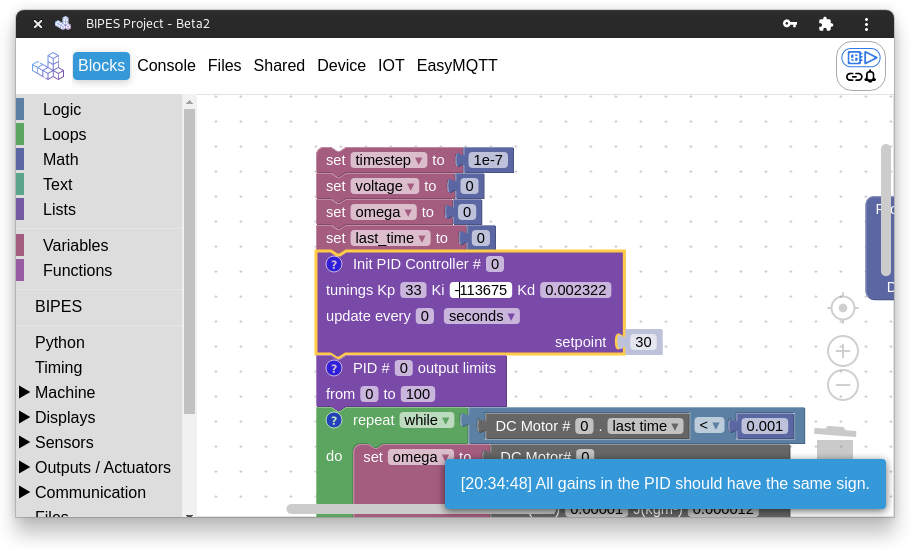
When working with blocks, now the code is smartly generated, allowing to feedback “compiled” data back to Blockly workspace. This means we will be able to create smarter blocks, like showing warnings and changing its color based on input3.
Offline version is back
Generate a non server version with make offline, it works by concatenating all JSON and XML data into index_offline.html file, “bypassing” chromium local file restriction (think of it as a “flash drive” version).
Documentation is coming
I have been studying JSDoc syntax and how sphinx and sphinx-js plugin would work with BIPES structure. I will be doing some tests soon and made myself the goal to documenting a function per commit.
Final words
BIPES is reaching some maturity, but we still have a long road ahead, if something doesn’t work as expected consider opening an issue and discussing in the forum to help us make BIPES better.
Also, would like to thank the wonderful support by the community in this development cycle.
Footnotes:
Be aware of your device memory allocation, while testing is fun, you will face a MemoryError when pushing your device to the limit.
100% Rafael Arouca work, but since it is so useful (and little tricky to figure it out) I decided to highlight here.
This feature was already available in this particular block, but in a very gimmick and resourceful way.
Program ESP32 using Bluetooth and BIPES / Web Bluetooth REPL
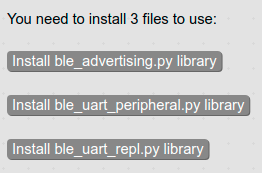
Install the required libraries (ESP32 must be connected to the Internet):
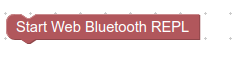
You can install by connecting to the board using BIPES console tab, and clicking on each of the buttons above, which are available on the toolbox (Select ESP32 board on the top right, then go to Network -> Web Bluetooth REPL).
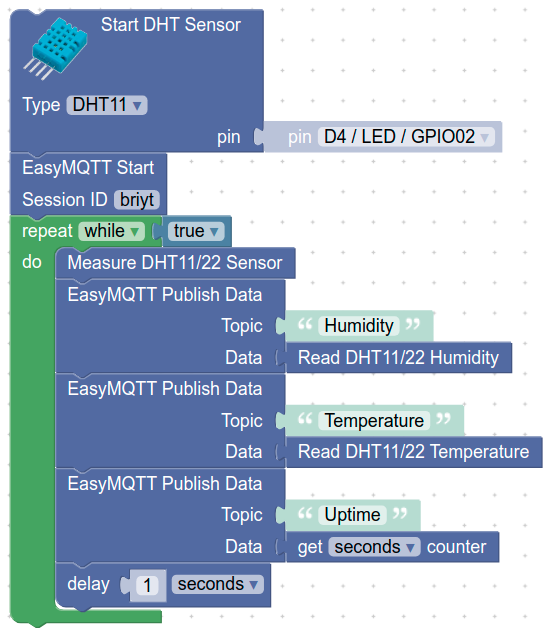
BIPES offers an EasyMQTT data source for freeboard dashboards. Moreover we embedded freeboard on the BIPES IoT tab. Programs can send data to the EasyMQTT server, which is stored and can be seen on the dashboard.
Here is an example program:
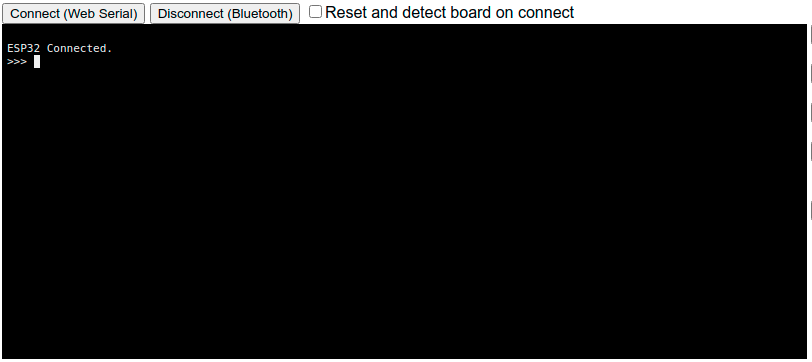
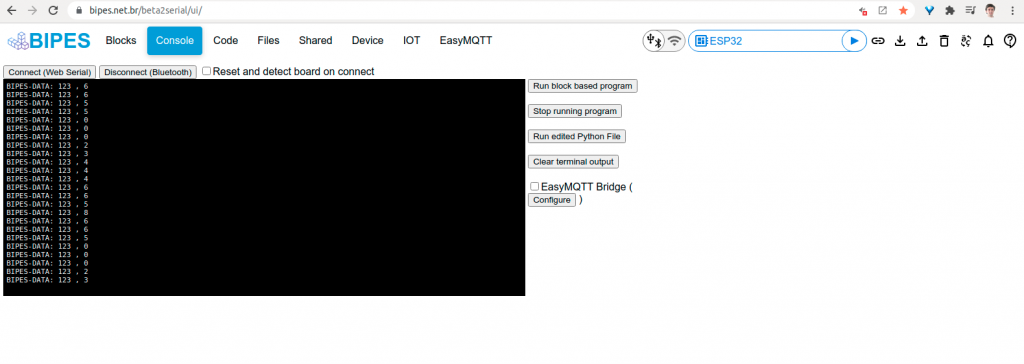
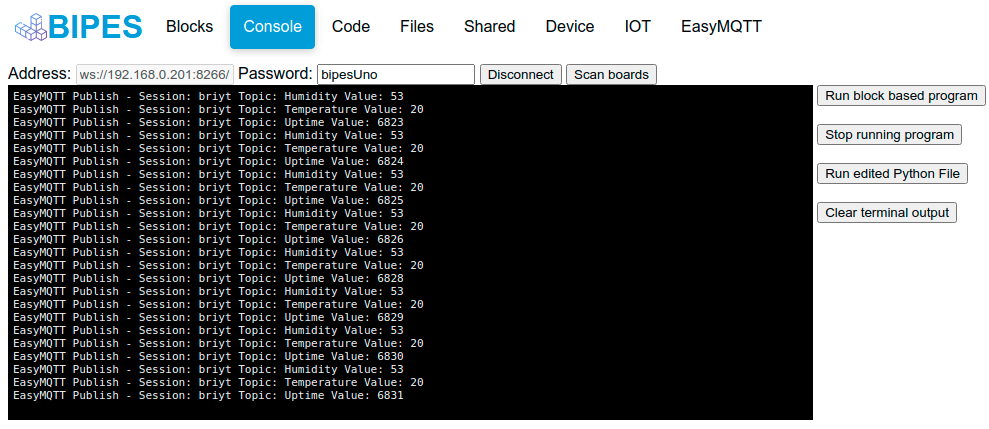
When the program starts, the console tab show its operation:
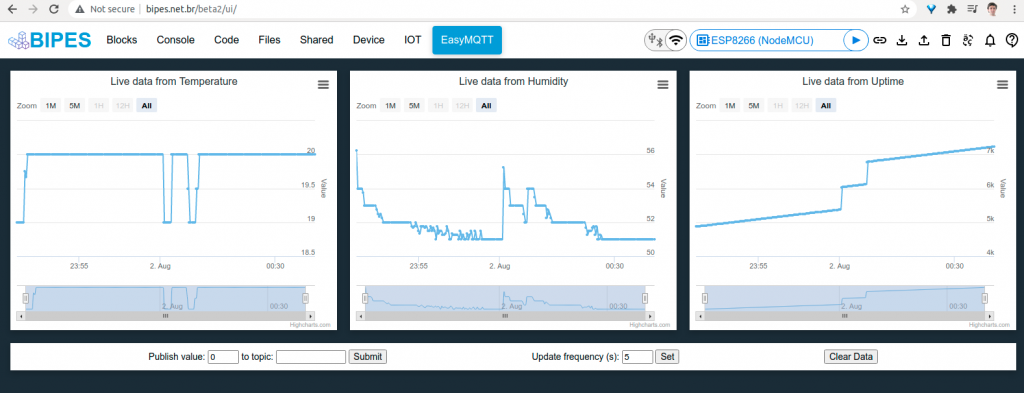
Next, by clicking on EasyMQTT tab, it is possible to see how data are changing:
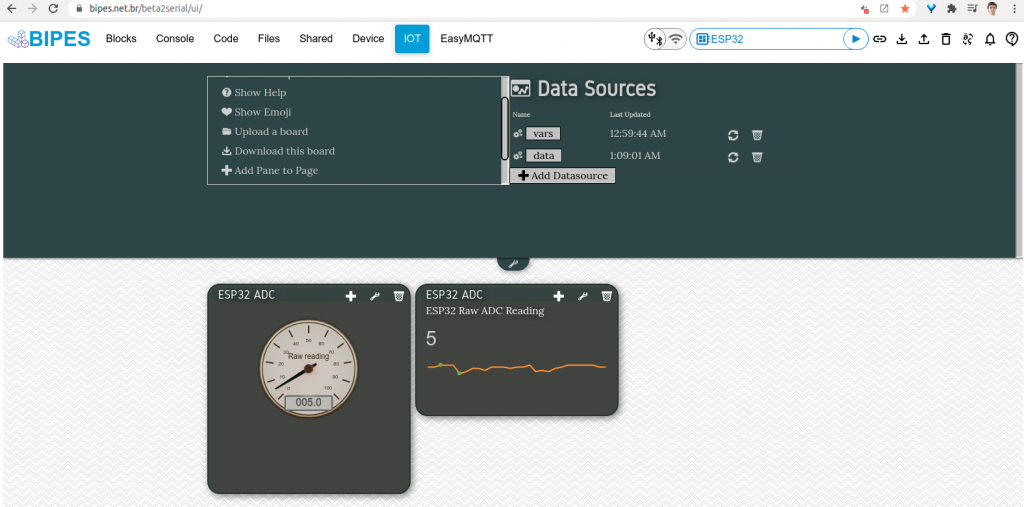
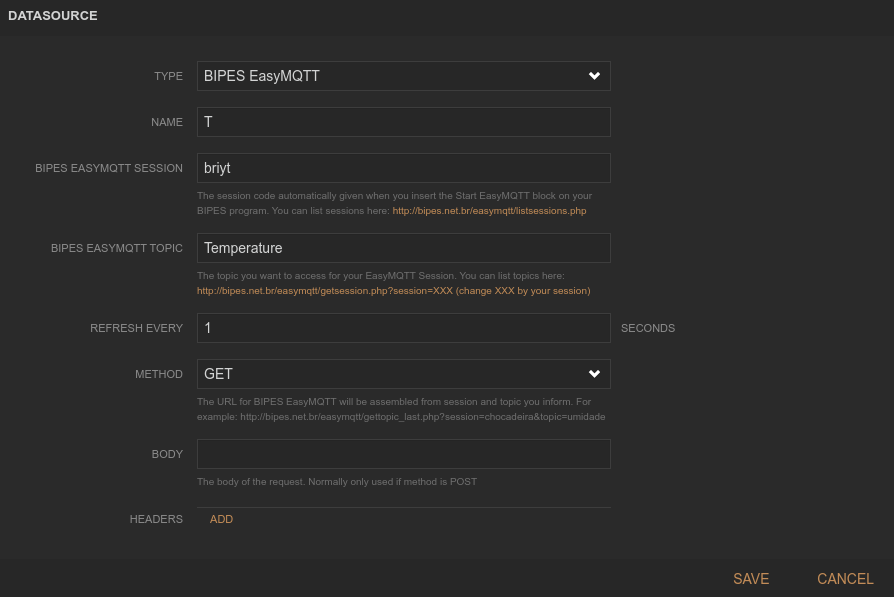
Now, we can go to the IoT tab and one data source for each EasyMQTT topic for this session:
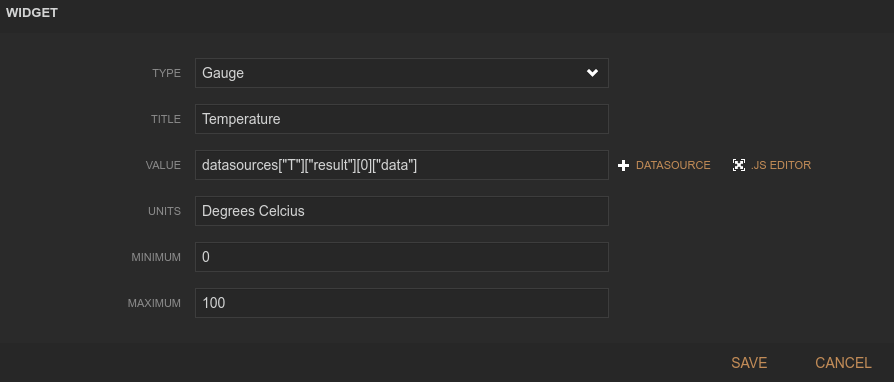
Next, add panes and widgets to panes, as this example:
BIPES allows you to create powerful dashboards based on freeboard. There are several possible data sources for the dashboard, but one interesting BIPES feature is to update the dashboard locally, with data from USB, Serial, or Bluetooth, without any network connection!
This works with any board that has a USB – Serial port, such as Raspberry Pi Pico, ESP32, ESP8266, STM32, and even Arduino. Yes! You can use BIPES to create a complete dashboard for Arduinos without connecting to a network, and no software installation is required. The Arduino does not need any additional shields or connections. Just plug the USB cable, receive data on the BIPES terminal and update the dashboard.
Here is a quick example:
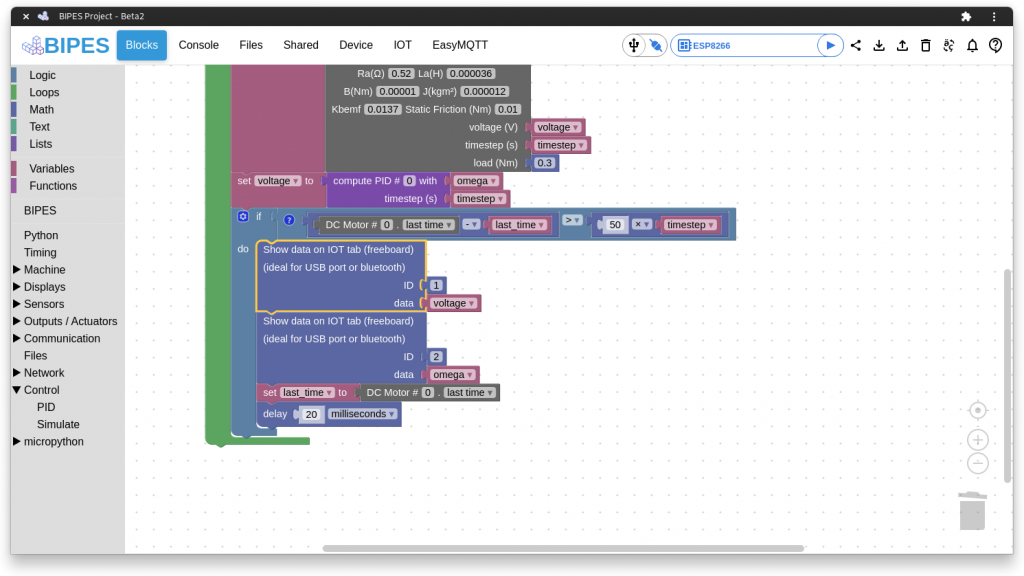
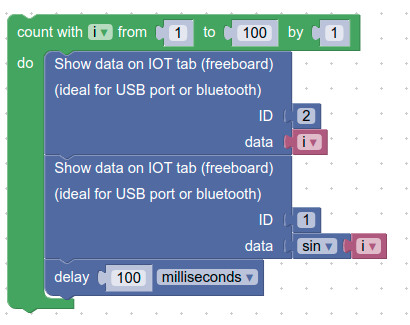
First, create a program that sends that to the dashboard. For example:
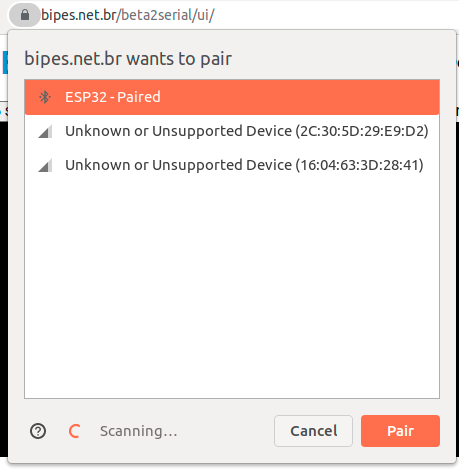
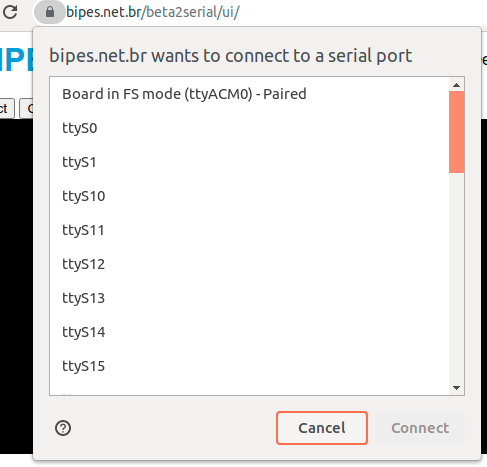
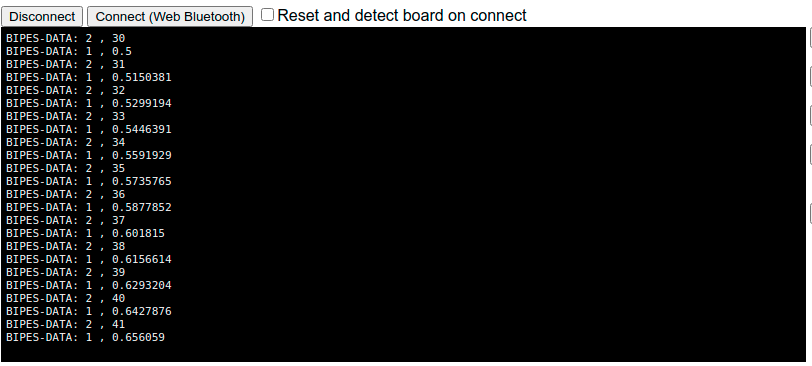
Then, connect to the board, using Console tab. You can make a Serial/USB or Bluetooth connection:
Note that we used ID 1 and ID 2.
If your microcontroller is not programmed by BIPES, no problem! Just print BIPES-DATA on the serial port. On Arduino, for example, you can use the code:
void setup() {
  Serial.begin(115200); //BIPES Console is an online terminal @115200bps
}

void loop() {
  int i = 1;

  while (i <= 100) {
    Serial.print("BIPES-DATA:1,");
    Serial.println(i);

    Serial.print("BIPES-DATA:2,");
    Serial.println(i*2);

    i = i + 1;
  }
}
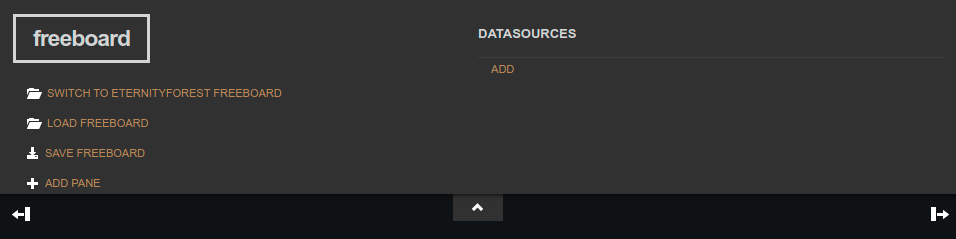
Now, let’s add widgets to the freeboard dashboard. Go to the IoT tab. Select if you want Forest or classic freeboard using the option “Switch to Classic Freeboard” or “Switch the EternityForest Freeboard”.
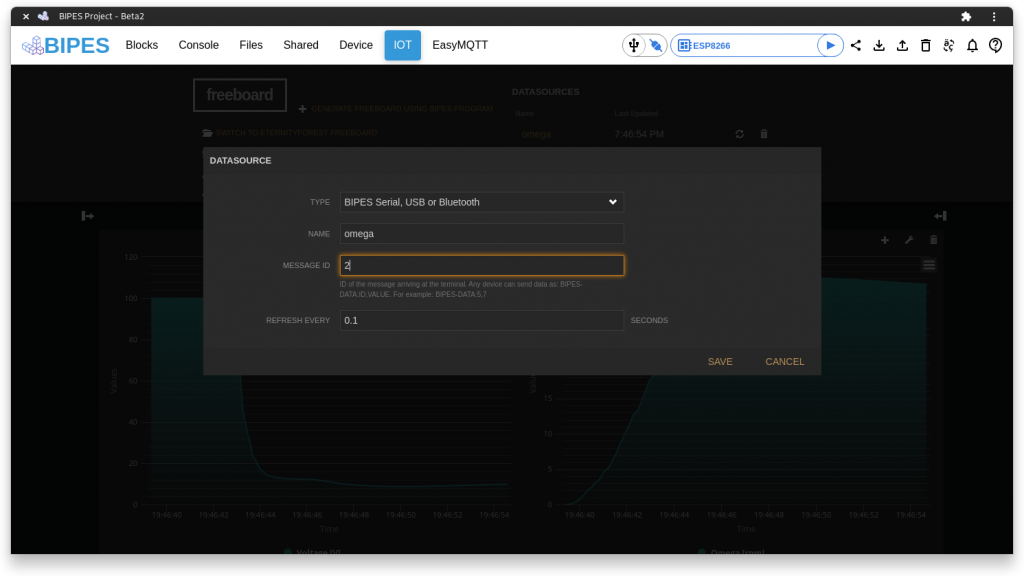
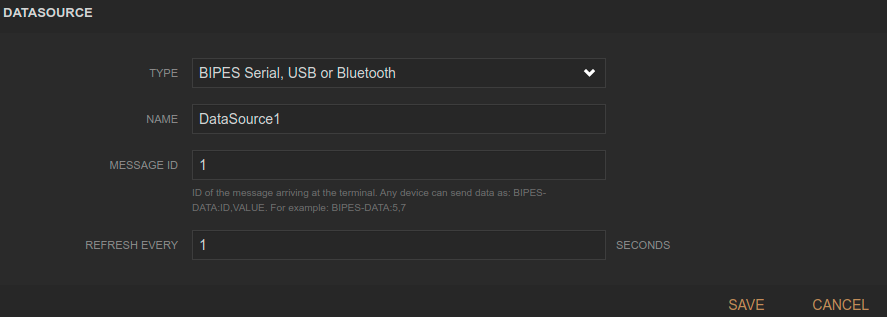
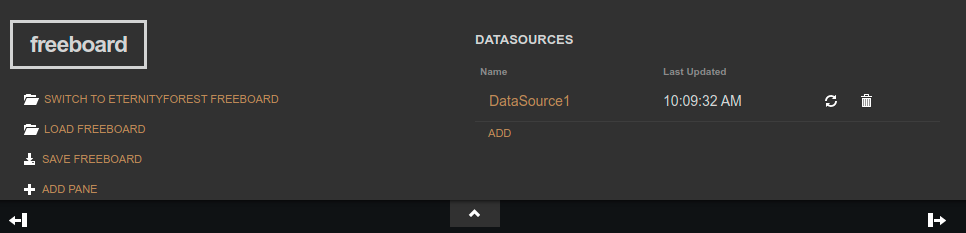
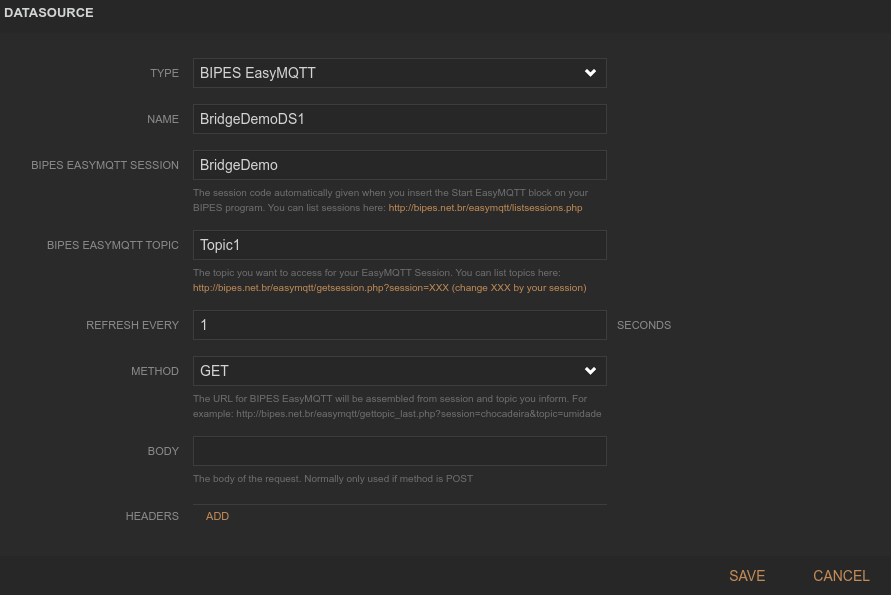
On the DATASOURCES area, click ADD and select BIPES Serial, USB or Bluetooth:
Give a name to the data source (you will use the name on the widget)
Select a message ID used on the blocks or Arduino code (1 or 2, on this example).
Define a refresh rate. It can be less than 1 second, such as 0.1
Save!
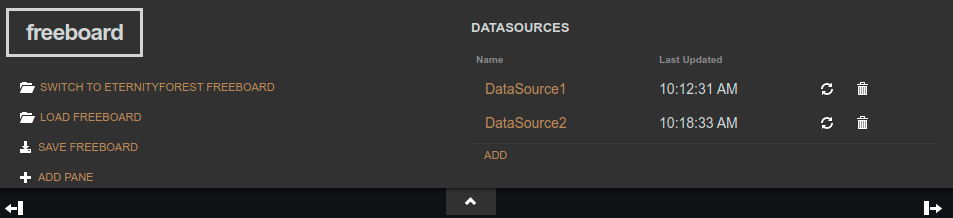
I also added a DataSource2 with ID 2, using the ADD button again.
Now you can run your program and see the results using the console tab. Start your program.
Last updated will show “never” if data for that ID never arrived and will show the update time when data arrives and is updated.
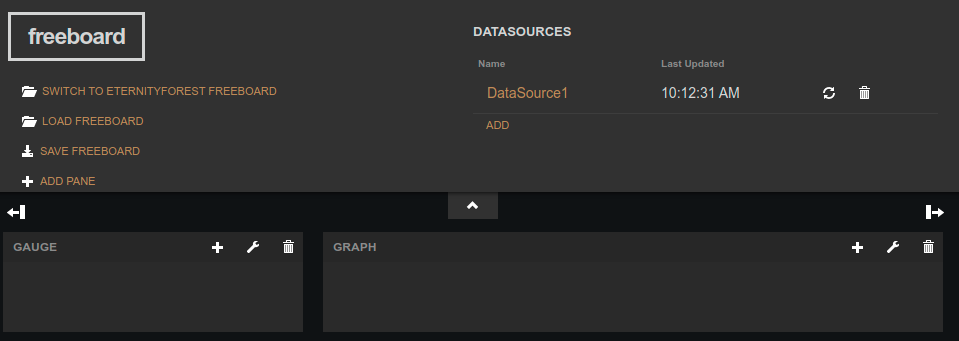
Now, let’s add some widgets:
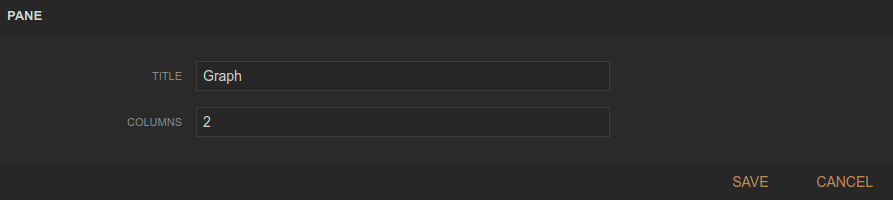
Click on ADD PANE. You can add several panes, drag and drop them, and click on the wrench to configure their titles and sizes.
The options are:
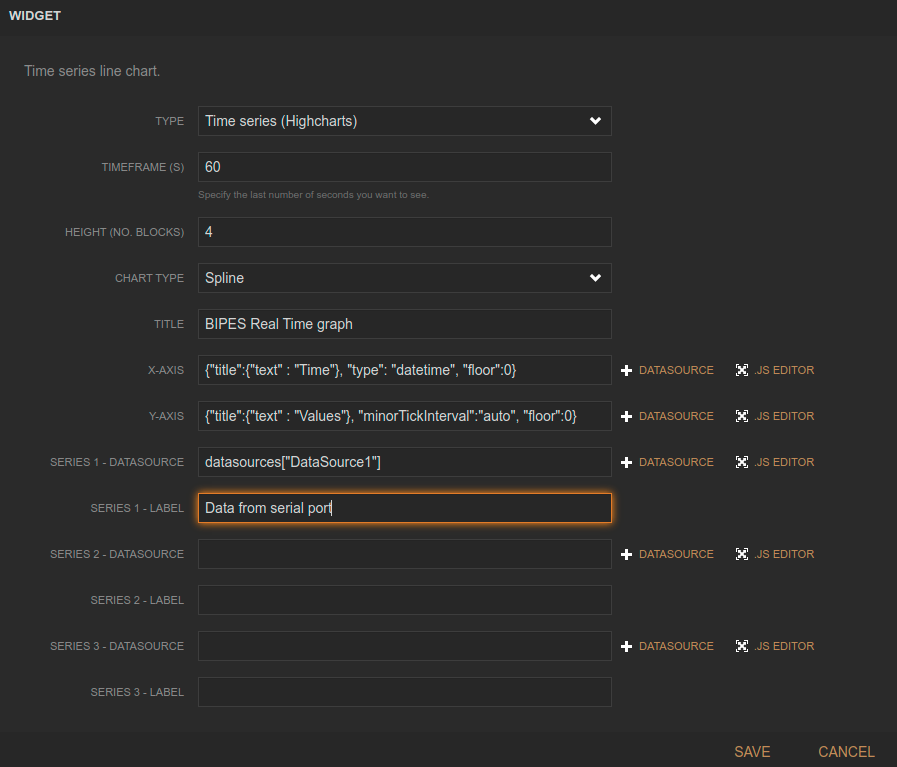
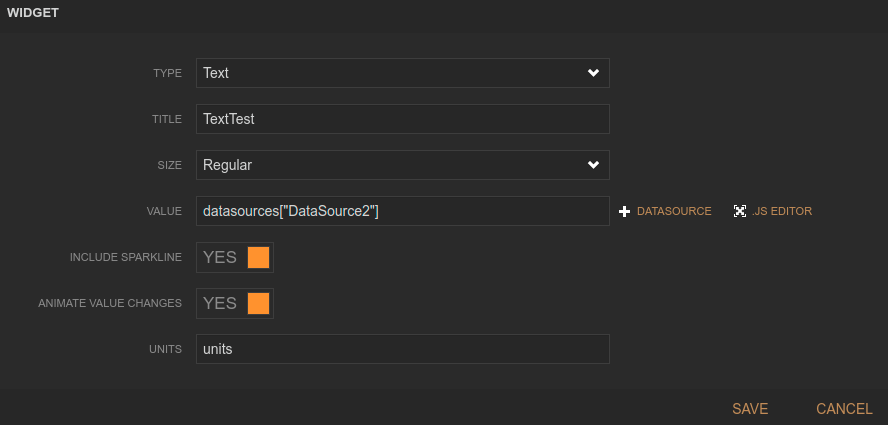
Then, you can add widgets to the panes, by clicking on the plus button on each pane:
A chart:
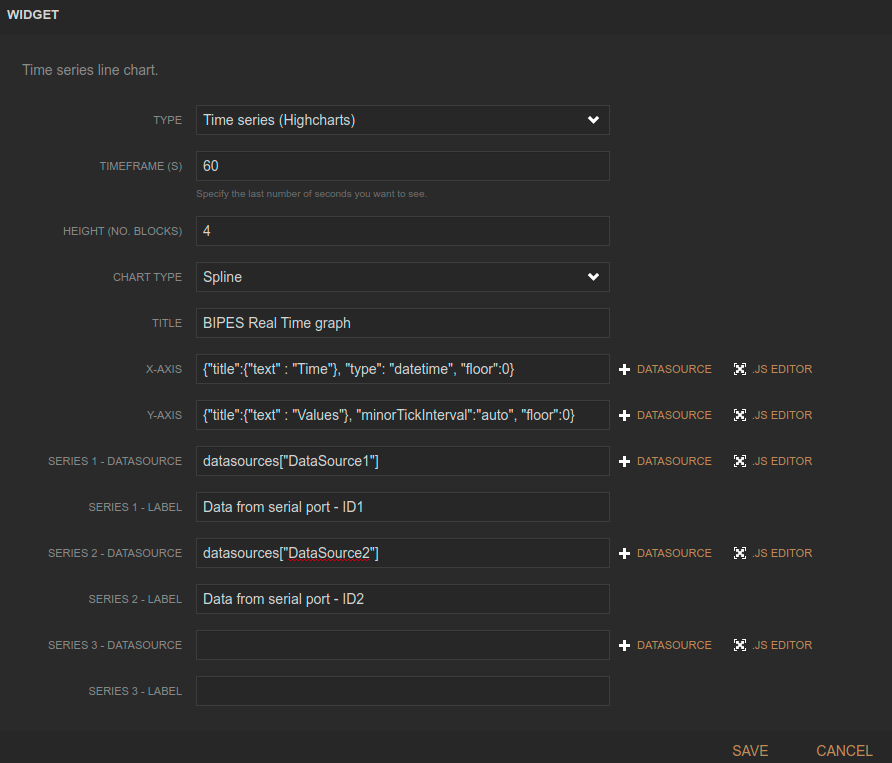
You can also have other lines on the graph:
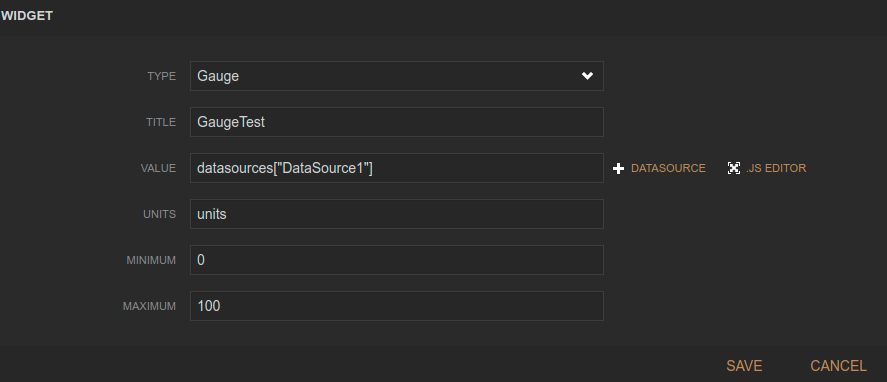
Now let’s add a gauge:
And finally a text:
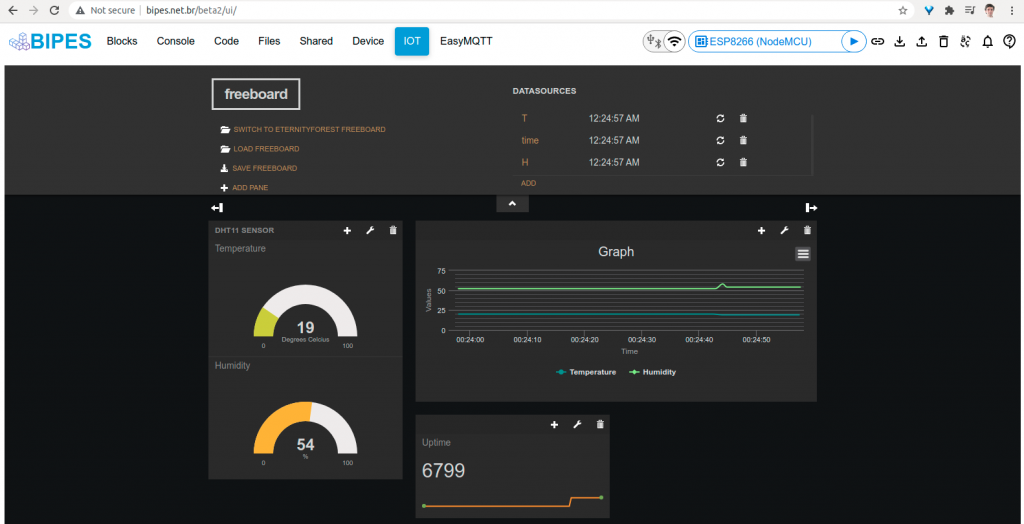
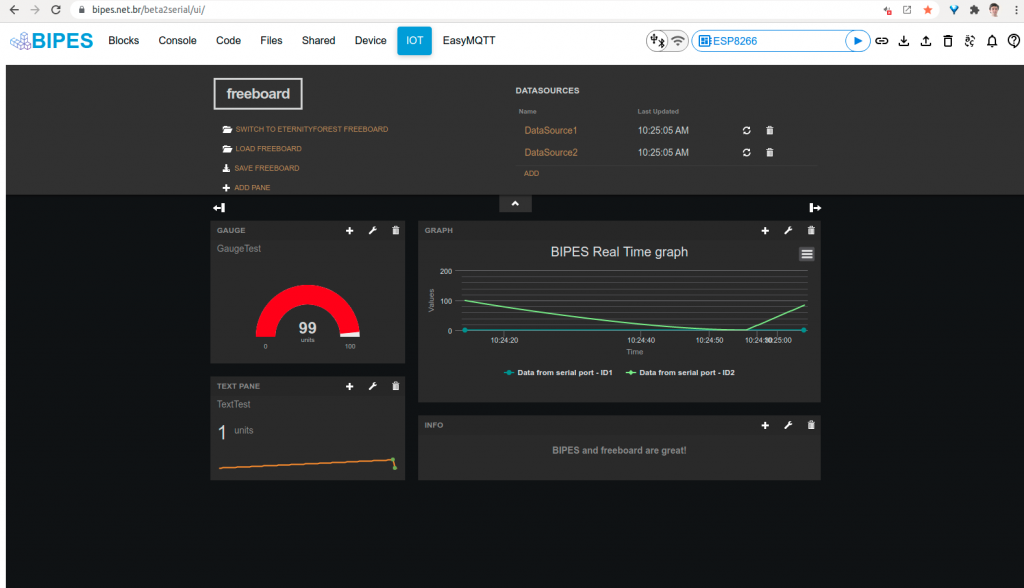
Here is the final result:
Start the program and see the results on the dashboard!
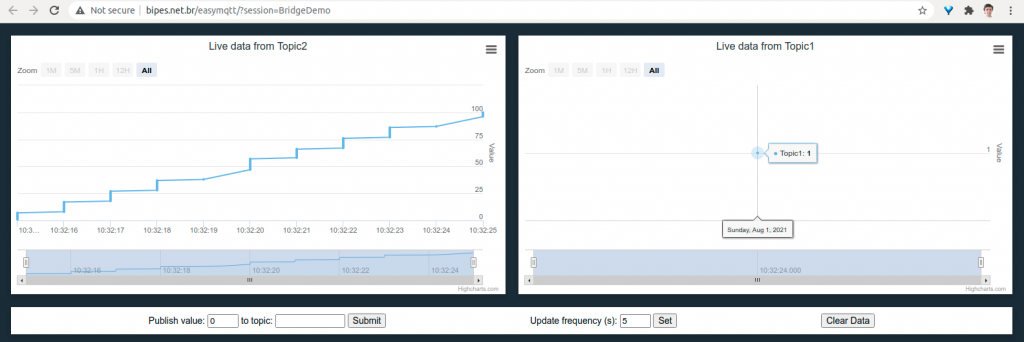
Bridge
Another nice feature: even using USB or Bluetooth, you can you BIPES Bridge to send to received data on the dashboard to the BIPES EasyMQTT server, and share the results using the Internet with anyone.
Board -> USB or Bluetooth -> BIPES Console -> EasyMQTT server -> EasyMQTT view from anywhere!
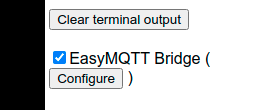
To use this feature, just enable the BIPES Bridge on the Console, by clicking on the checkbox:
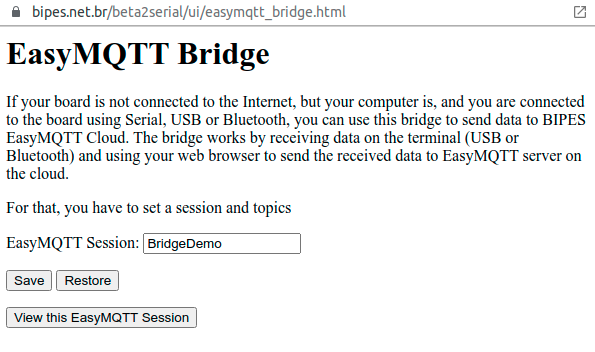
You can configure the EasyMQTT Session name using the configure button: