BIPES allows you to create powerful dashboards based on freeboard. There are several possible data sources for the dashboard, but one interesting BIPES feature is to update the dashboard locally, with data from USB, Serial, or Bluetooth, without any network connection!
This works with any board that has a USB – Serial port, such as Raspberry Pi Pico, ESP32, ESP8266, STM32, and even Arduino. Yes! You can use BIPES to create a complete dashboard for Arduinos without connecting to a network, and no software installation is required. The Arduino does not need any additional shields or connections. Just plug the USB cable, receive data on the BIPES terminal and update the dashboard.
Here is a quick example:
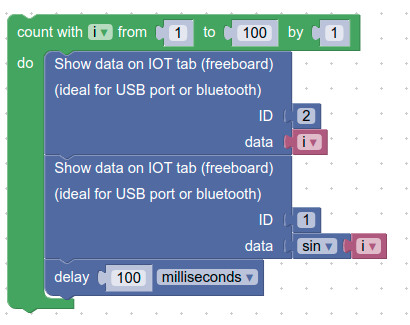
First, create a program that sends that to the dashboard. For example:
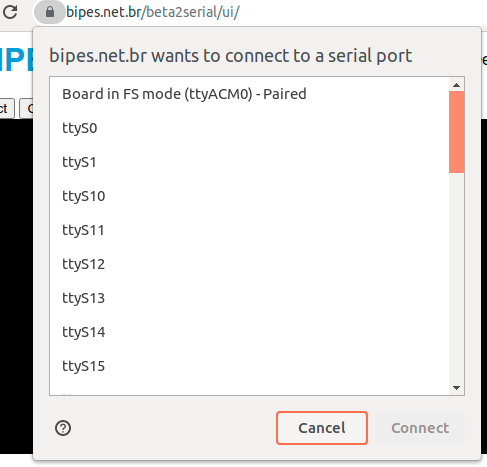
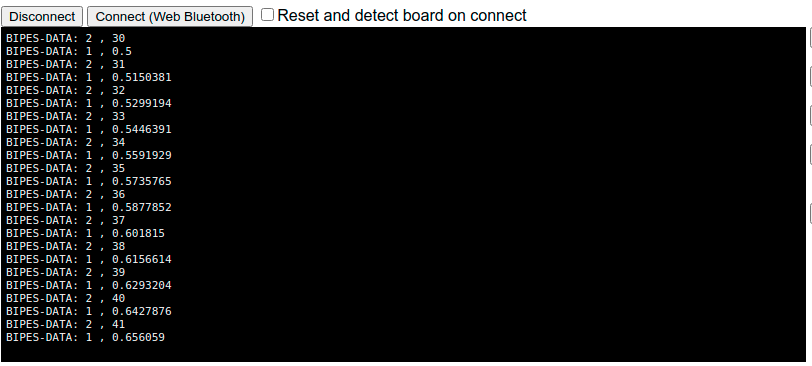
Then, connect to the board, using Console tab. You can make a Serial/USB or Bluetooth connection:
Note that we used ID 1 and ID 2.
If your microcontroller is not programmed by BIPES, no problem! Just print BIPES-DATA on the serial port. On Arduino, for example, you can use the code:
void setup() {
  Serial.begin(115200); //BIPES Console is an online terminal @115200bps
}

void loop() {
  int i = 1;

  while (i <= 100) {
    Serial.print("BIPES-DATA:1,");
    Serial.println(i);

    Serial.print("BIPES-DATA:2,");
    Serial.println(i*2);

    i = i + 1;
  }
}
Now, let’s add widgets to the freeboard dashboard. Go to the IoT tab. Select if you want Forest or classic freeboard using the option “Switch to Classic Freeboard” or “Switch the EternityForest Freeboard”.
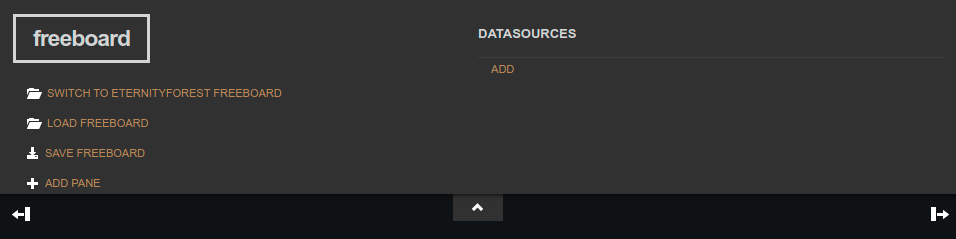
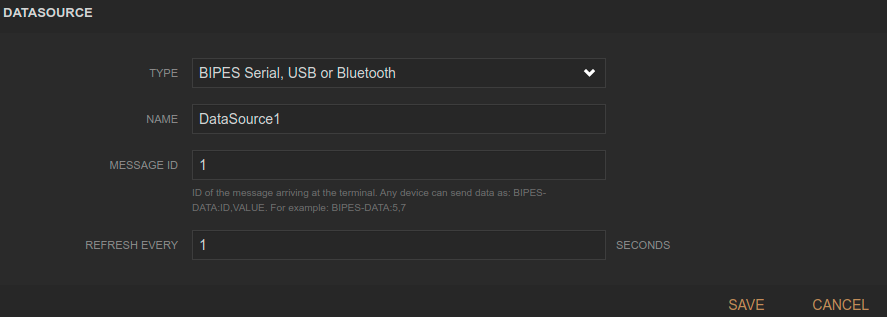
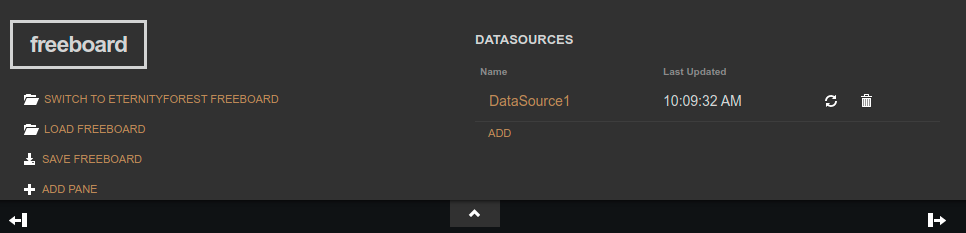
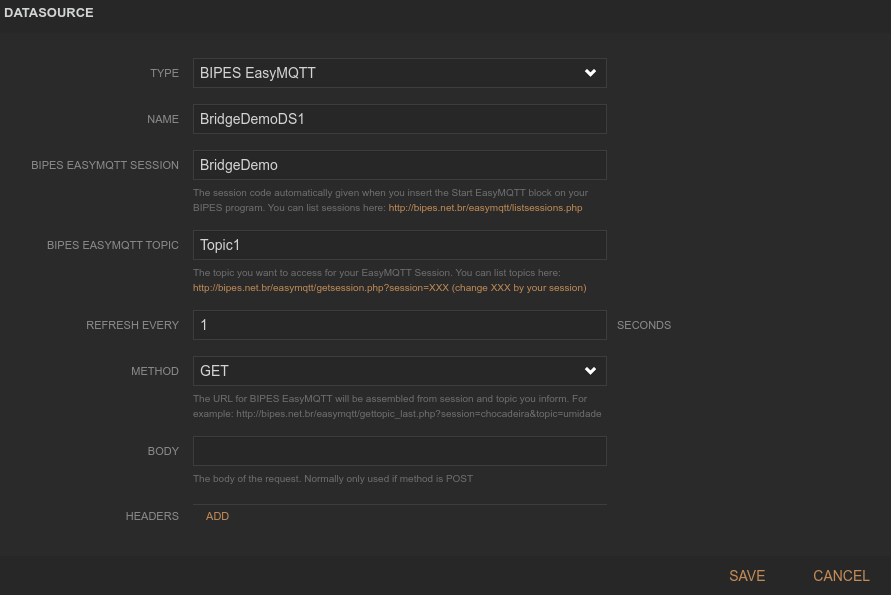
On the DATASOURCES area, click ADD and select BIPES Serial, USB or Bluetooth:
Give a name to the data source (you will use the name on the widget)
Select a message ID used on the blocks or Arduino code (1 or 2, on this example).
Define a refresh rate. It can be less than 1 second, such as 0.1
Save!
I also added a DataSource2 with ID 2, using the ADD button again.
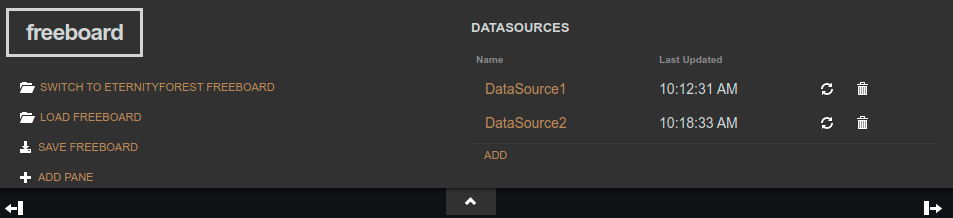
Now you can run your program and see the results using the console tab. Start your program.
Last updated will show “never” if data for that ID never arrived and will show the update time when data arrives and is updated.
Now, let’s add some widgets:
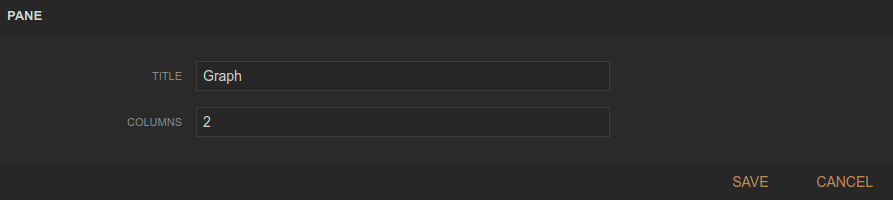
Click on ADD PANE. You can add several panes, drag and drop them, and click on the wrench to configure their titles and sizes.
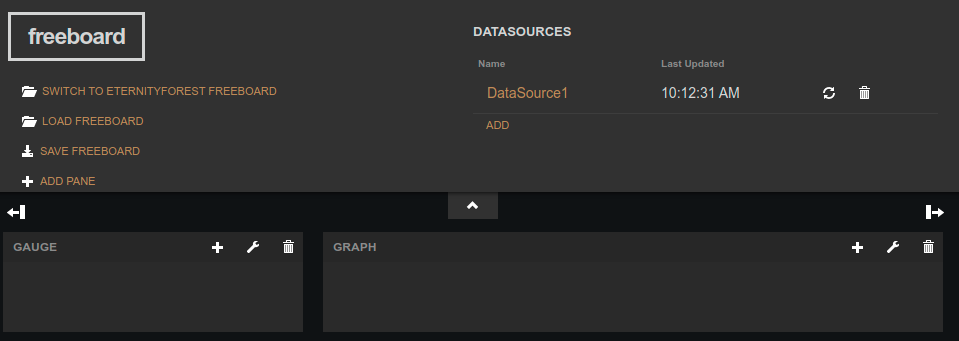
The options are:
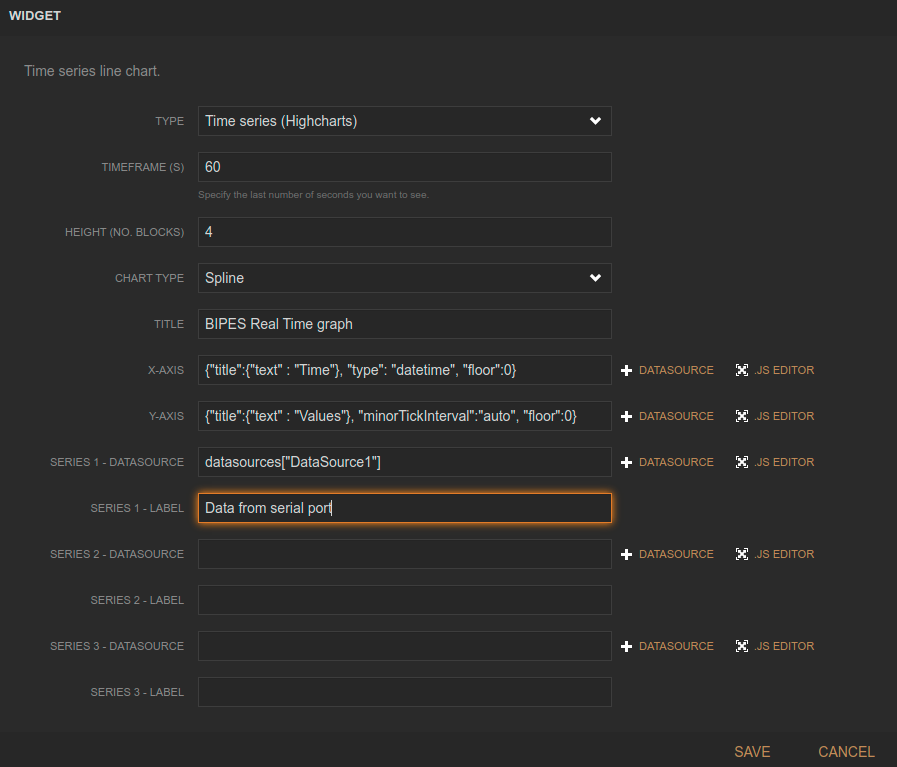
Then, you can add widgets to the panes, by clicking on the plus button on each pane:
A chart:
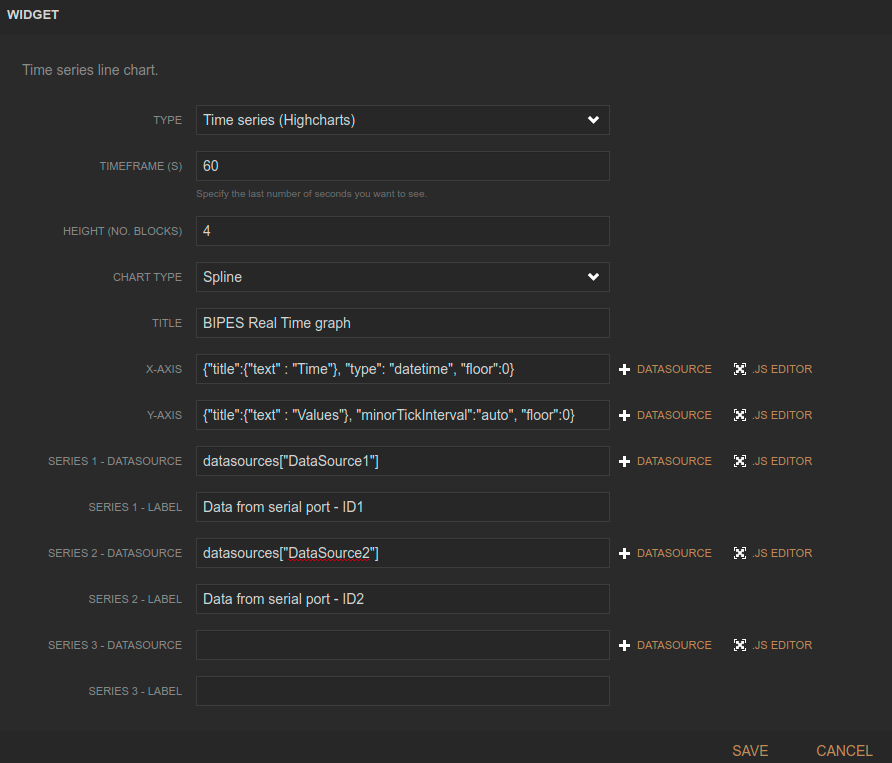
You can also have other lines on the graph:
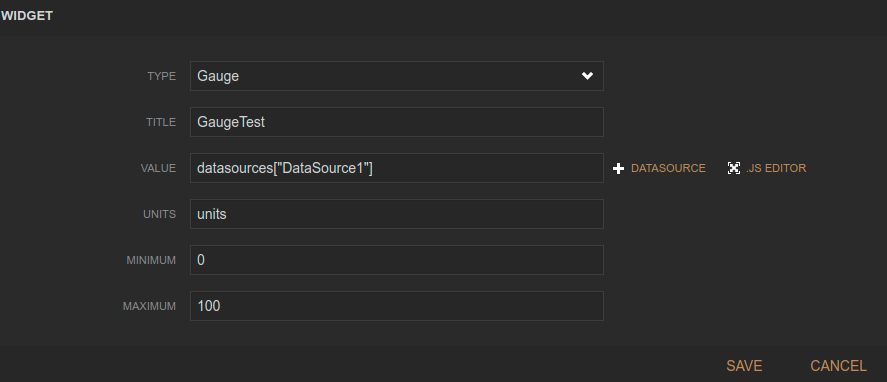
Now let’s add a gauge:
And finally a text:
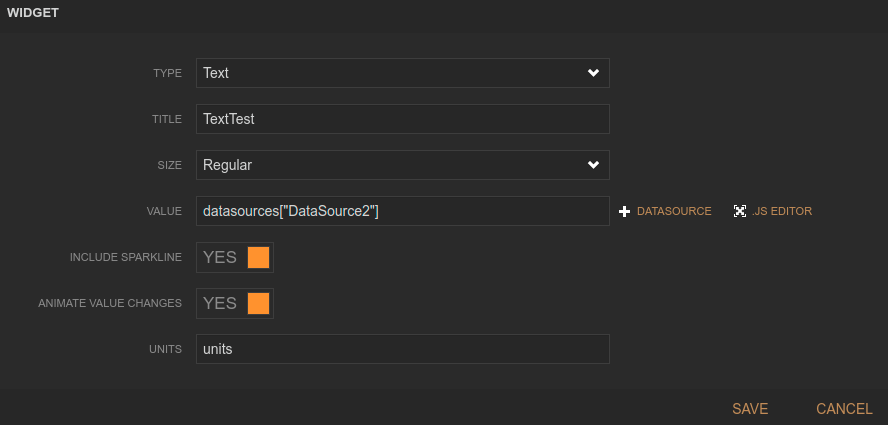
Here is the final result:
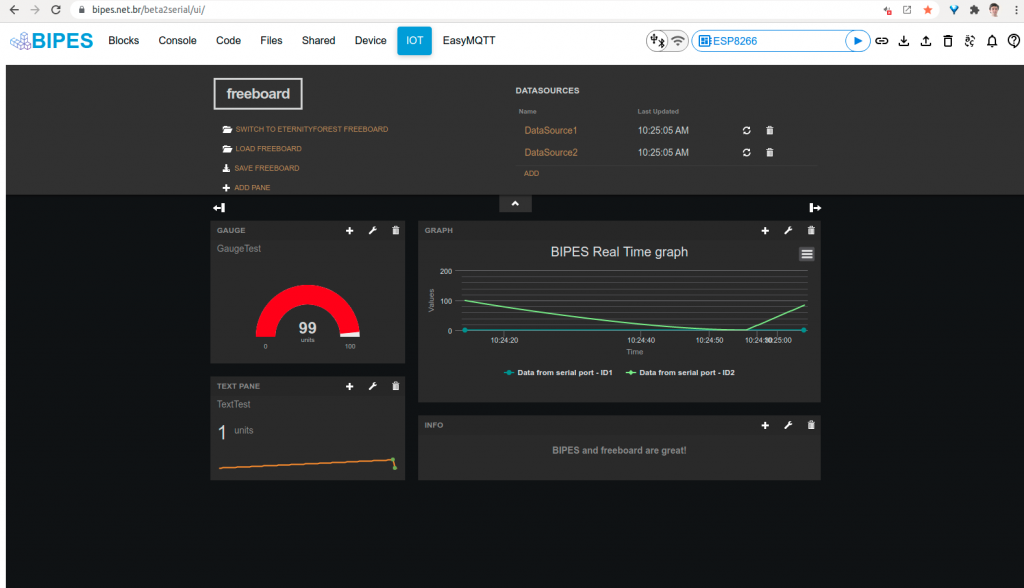
Start the program and see the results on the dashboard!
Bridge
Another nice feature: even using USB or Bluetooth, you can you BIPES Bridge to send to received data on the dashboard to the BIPES EasyMQTT server, and share the results using the Internet with anyone.
Board -> USB or Bluetooth -> BIPES Console -> EasyMQTT server -> EasyMQTT view from anywhere!
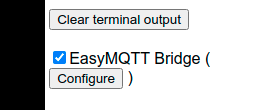
To use this feature, just enable the BIPES Bridge on the Console, by clicking on the checkbox:
You can configure the EasyMQTT Session name using the configure button:
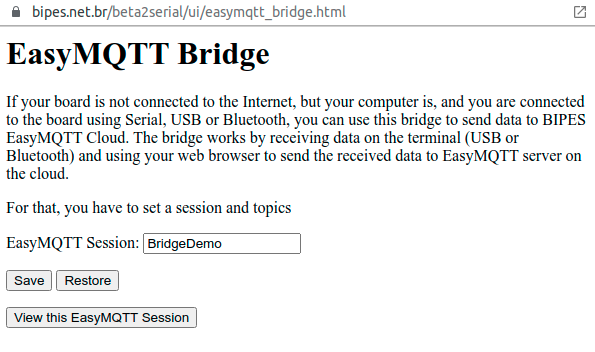
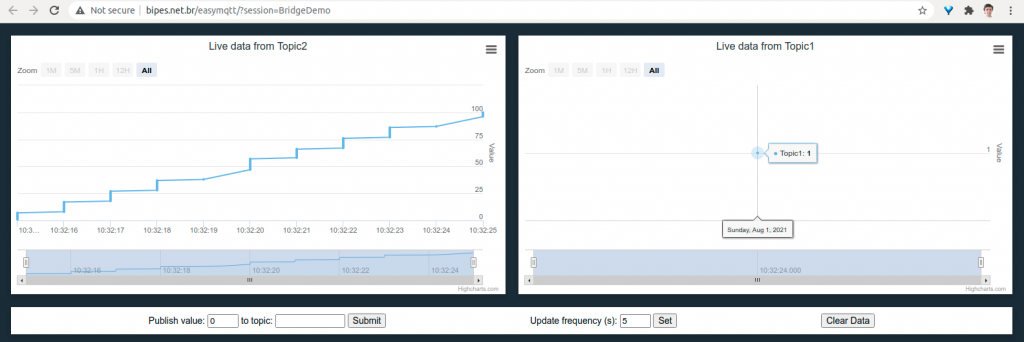
Finally, access the EasyMQTT page:
http://bipes.net.br/easymqtt/?session=BridgeDemo
You can share the link with anyone, anywhere!

Start the program, and the graph will be updated:
EasyMQTT DataSource
Finally, you can also create use the EasyMQTT datasource on freeboard, which can be used to share EasyMQTT to freeboard over Internet:
Freeboard source code with BIPES datasource sources:
https://github.com/rafaelaroca/freeboard